Design guide
Design guide
Design guide
The Convert Records button allows users to copy specified field values from a record to another sheet. Converting records is different from using Multiple Versions. When you convert a record, the data is copied to another sheet with no link between the two sets of data, so modifying the converted record will not affect the source record.
Convert Records offers two modes:
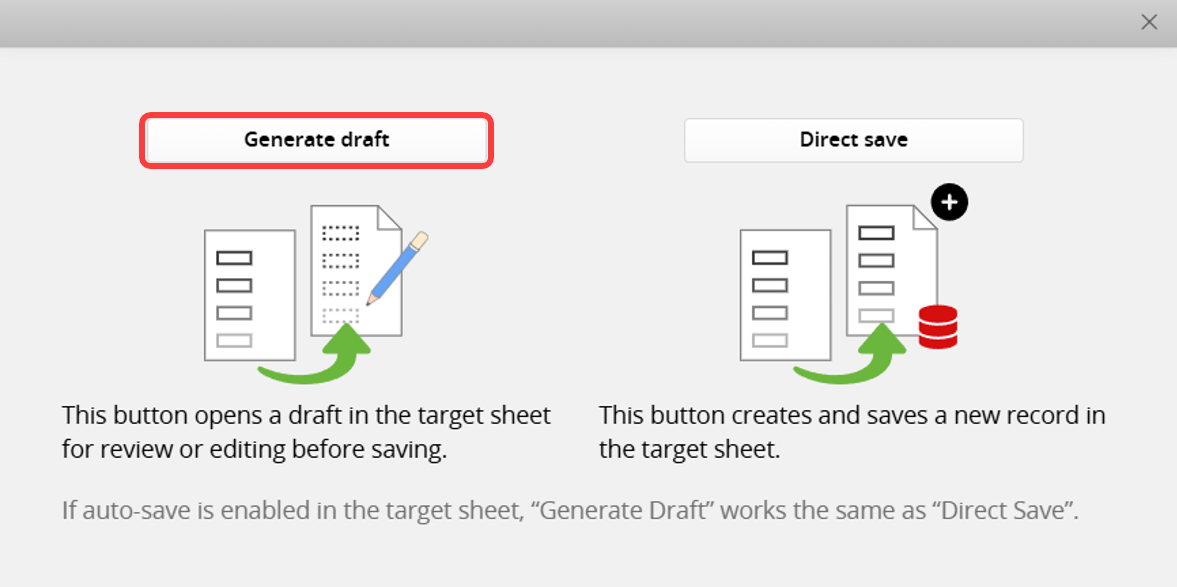
1. Convert Records: Generate Draft: Opens a draft in the target sheet for review or editing before saving.
2. Convert Records: Direct Save: Creates and saves a new record in the target sheet directly. For more details, please refer to Convert Records: Direct Save.
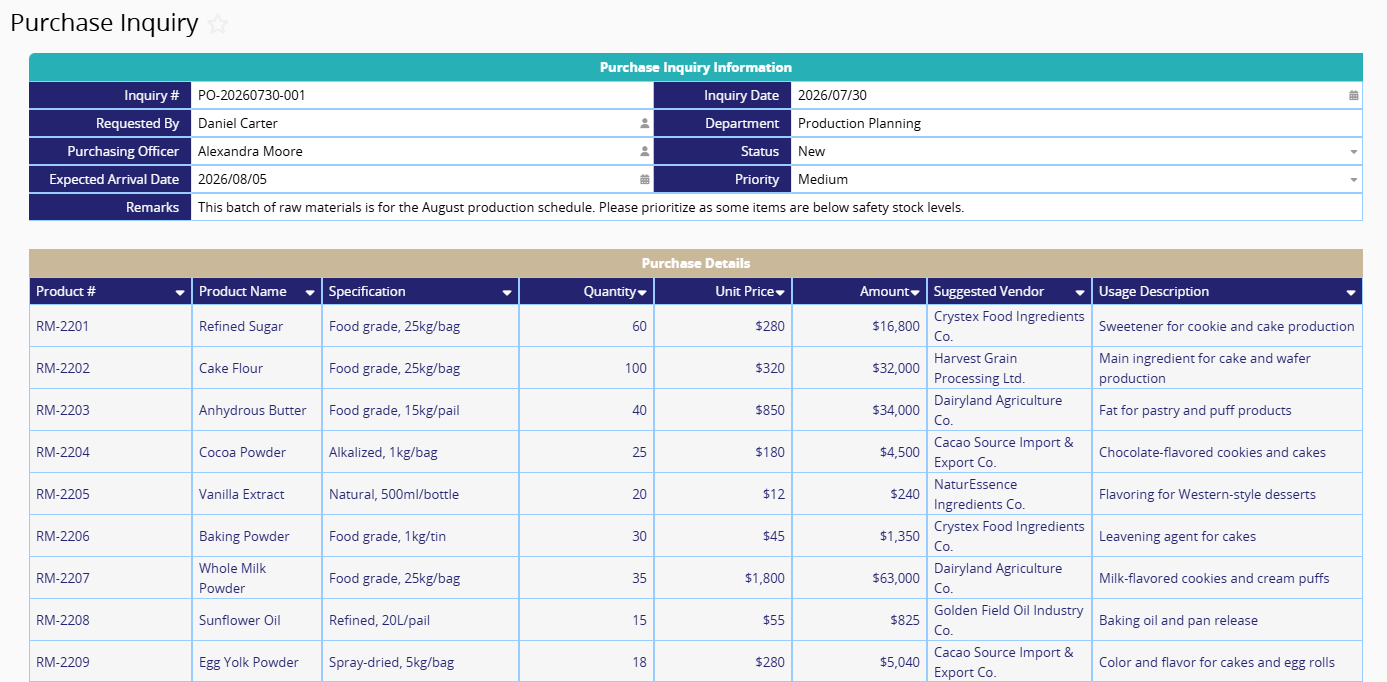
Convert Records: Generate Draft is suitable when you need to review or adjust the converted content before saving. For example, when converting a "Purchase Requisition" to a "Purchase Inquiry", the converted content can be reviewed and adjusted before saving.
Note: If auto-save is enabled in the target sheet, "Generate Draft" works the same as "Direct Save".
The following uses "Purchase Requisition" converting to "Purchase Inquiry" as an example, showing how Convert Records can bring item and quantity data into the target sheet without re-entering it.
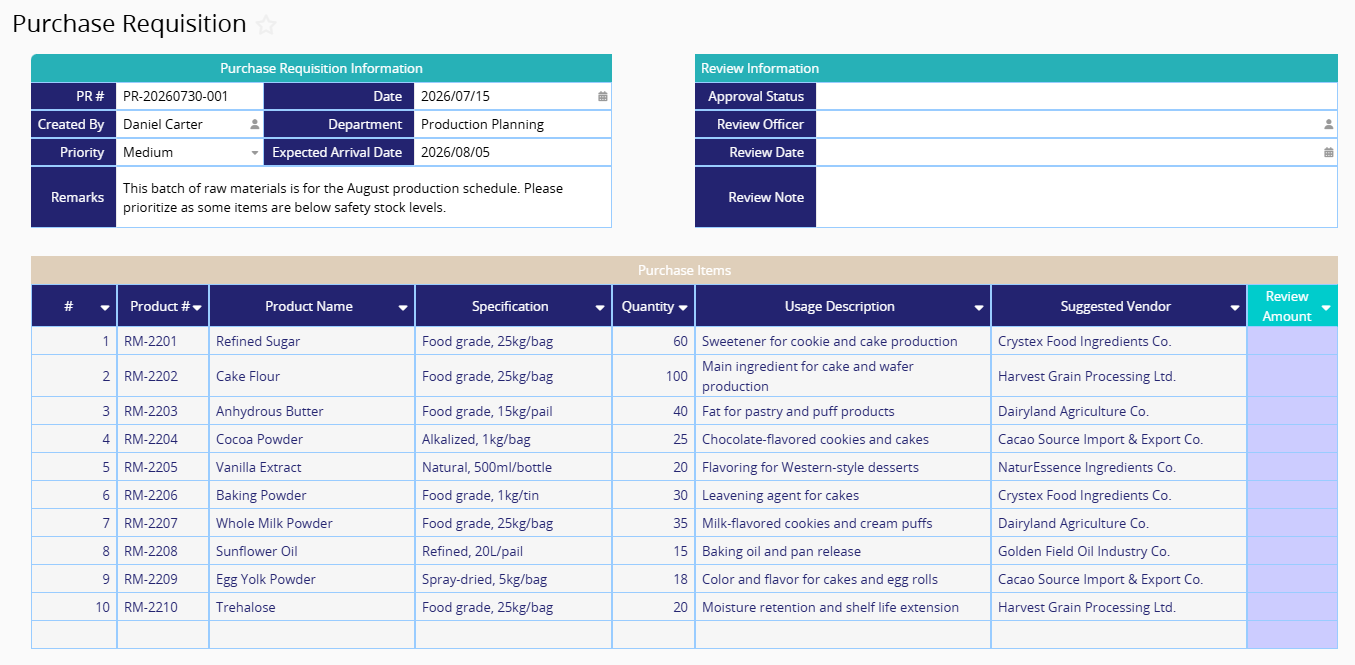
The "Purchase Inquiry" has a similar structure to the "Purchase Requisition". While this is not required for converting records, a consistent design makes modifications and identification easier.
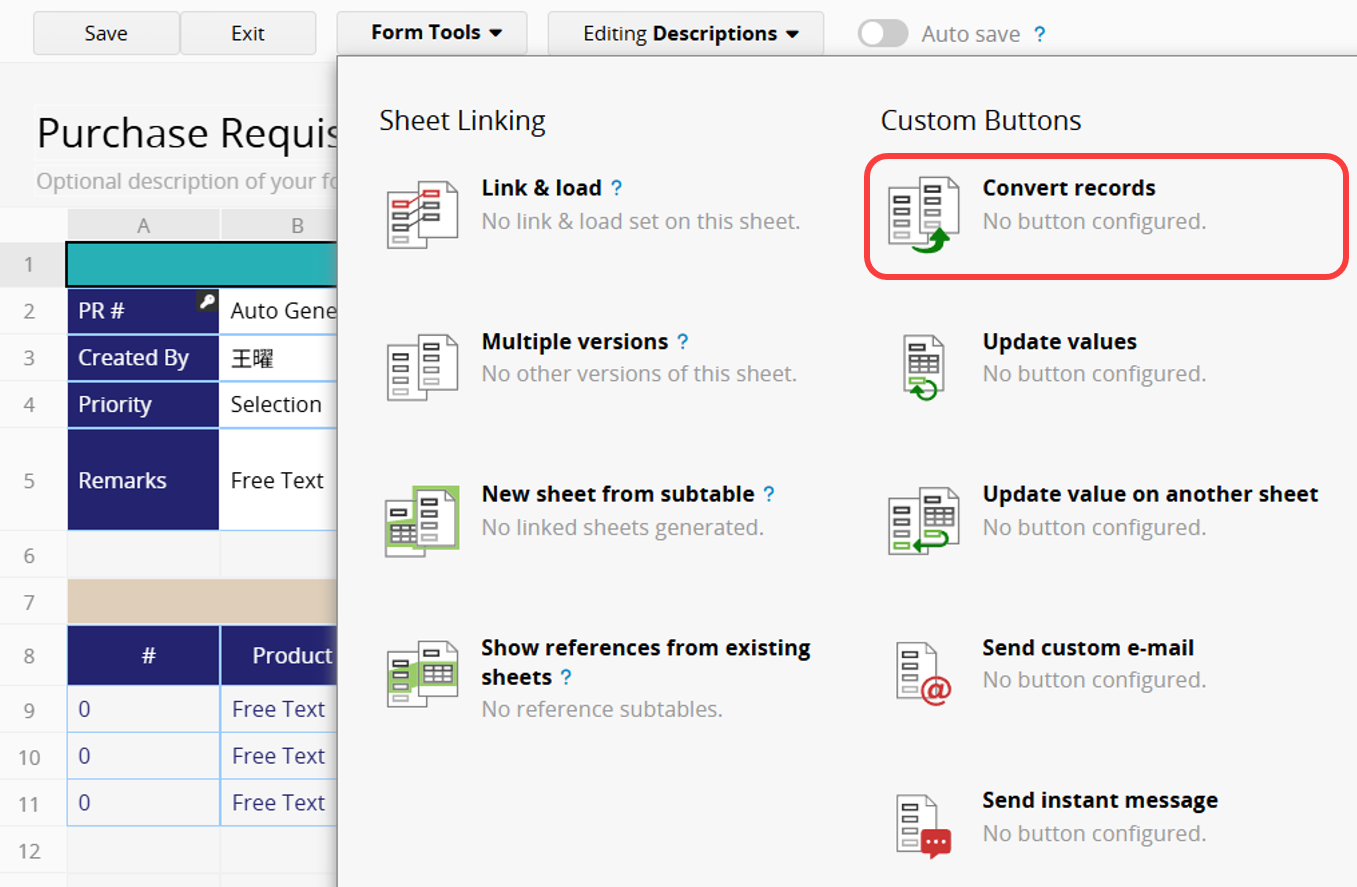
Navigate to the Design Mode of the source sheet. Click on Form Tools and select Convert Records under the Custom Buttons section.
Choose Generate draft to enter the setup interface.
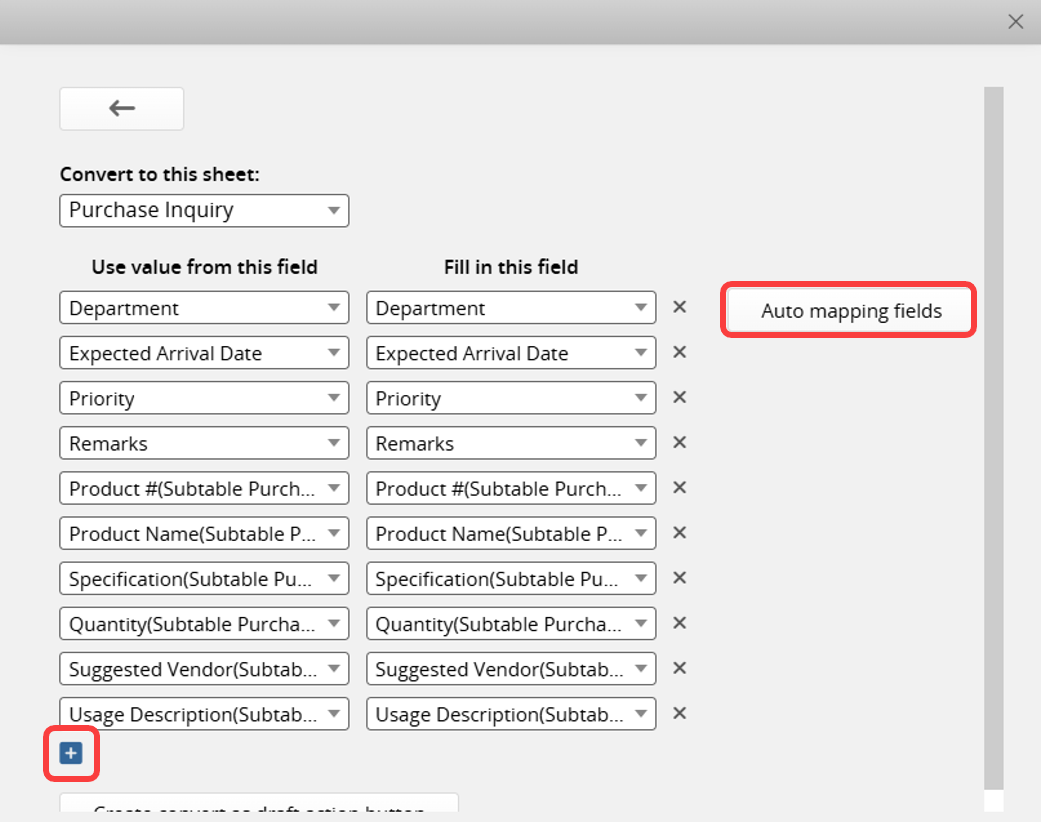
Select the target sheet and configure which fields from the current sheet should be copied to which fields in the target sheet. You can add corresponding fields using the + button or use Auto mapping fields on the right to automatically populate fields with matching names on both sides.
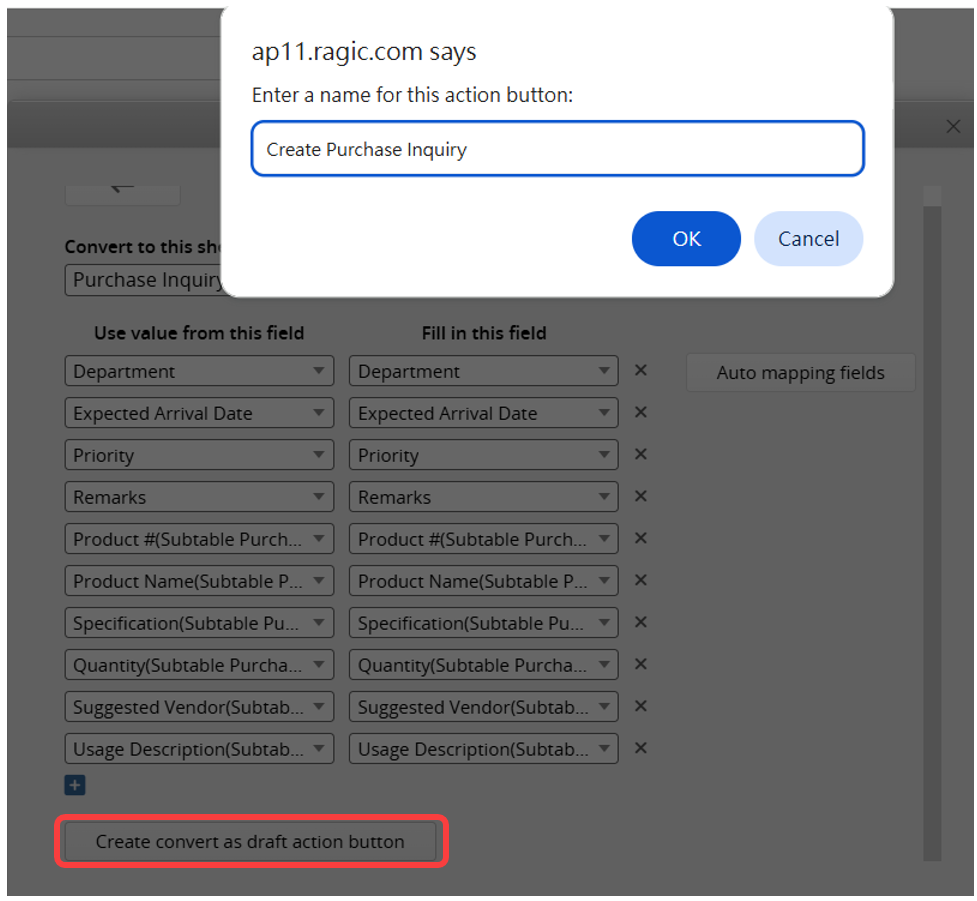
After configuring, click Create convert as draft action button and name it. It is recommended to use a clear and concise name that allows users to quickly identify its purpose.
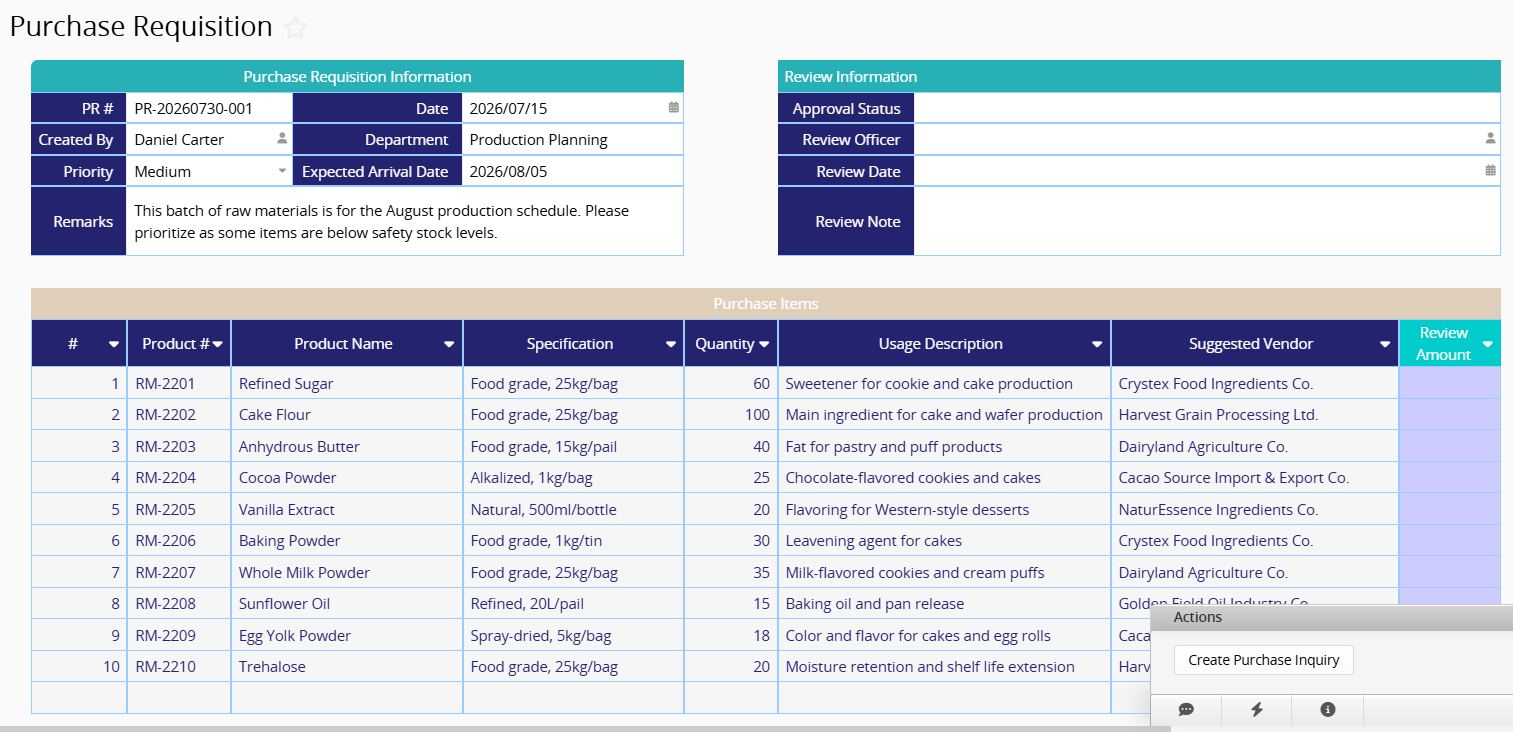
After saving and exiting Design Mode, you will see the added button in the lower-right corner of the source sheet.
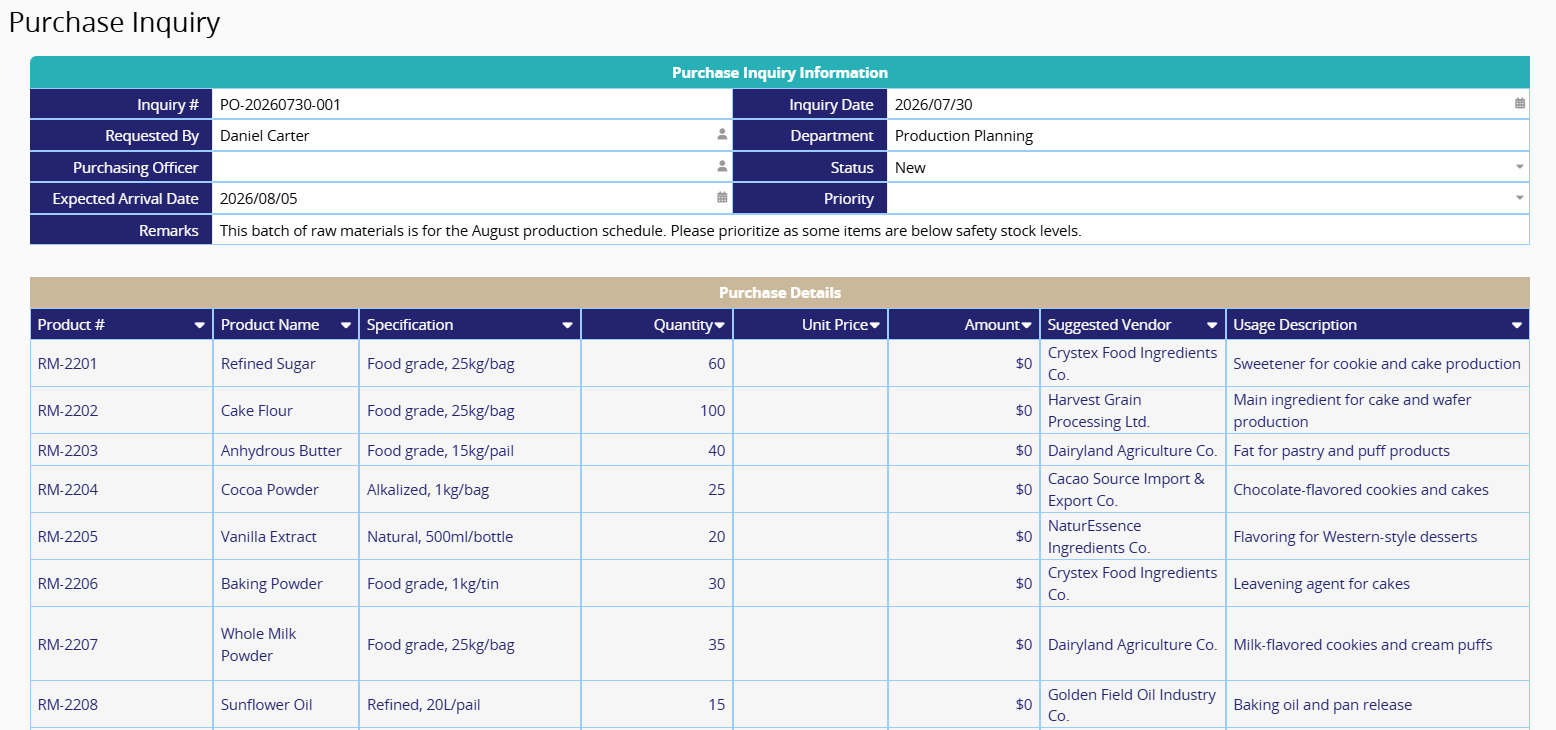
When a user clicks the button, the system opens a draft in the target sheet with field values brought in from the source record, including both independent fields and Subtable items. After reviewing or modifying the content, the user can manually save the record.
To edit the Convert Record button again, you can return to Design Mode, find this button in the Form Tools menu, click on the button name, and make your modifications.
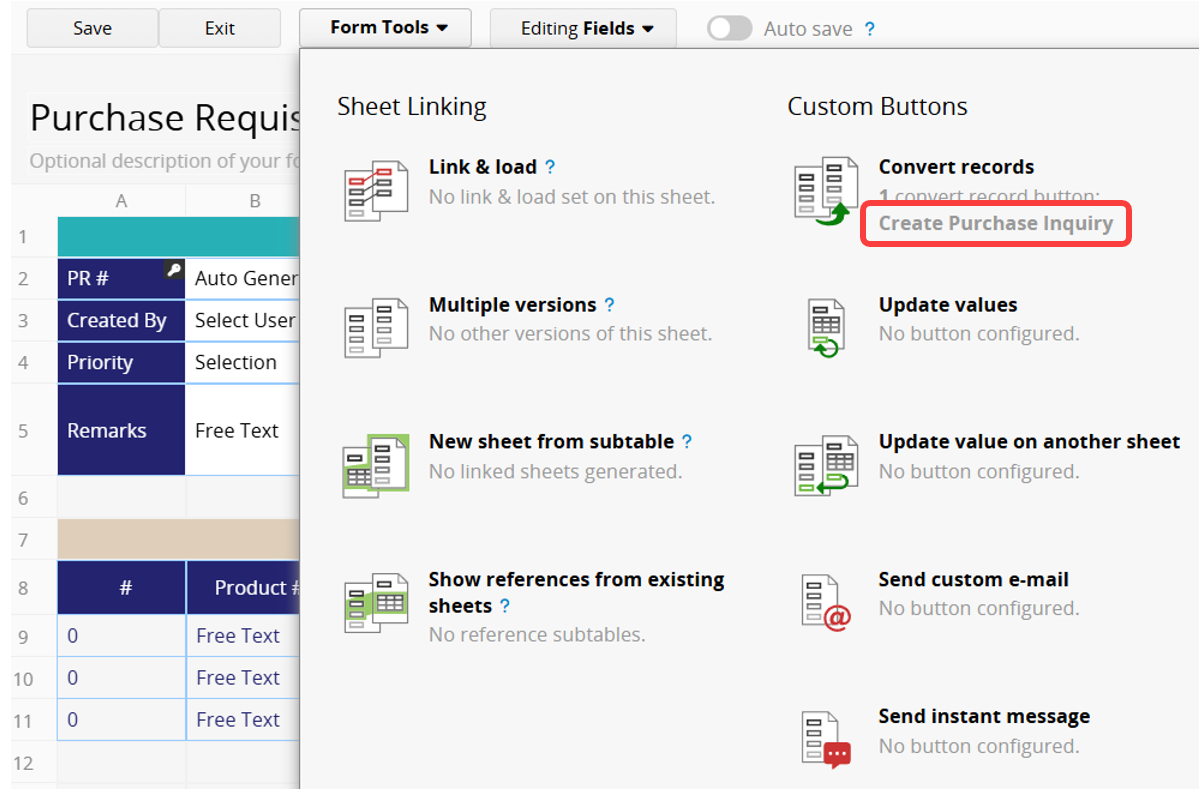
The table below shows the field mapping rules for Generate Draft. Note that since a Subtable may contain multiple rows of data, mapping an independent field to a Subtable field or a Subtable field to an independent field is not supported.
| To an independent field | To Subtable fields | |
|---|---|---|
| From an independent field | ✔ | ✘ |
| From Subtable fields | ✘ | ✔ |
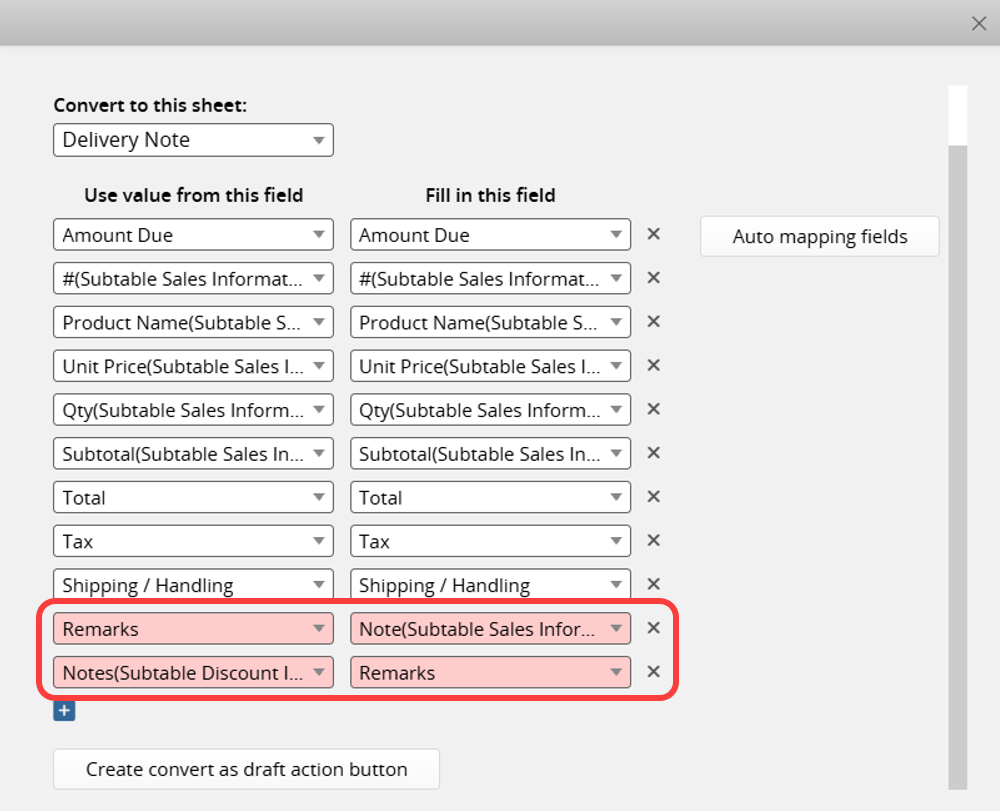
When mapping fields, if selecting an independent field mapped to a Subtable field or a Subtable field mapped to an independent field, the system will mark the row in red to prevent accidental selection.
1. The following Field Types are not supported as either a Source or Target Field for conversion: File Upload, Image Upload, Signature, Barcode, Masked Text, Recurring Date, Reviewer, Aggregate, Payment, Action Barcode, Exchange Rate.
Auto Generate and Read Only fields are only unsupported when used as the Target Field; they can still be used as the Source Field.
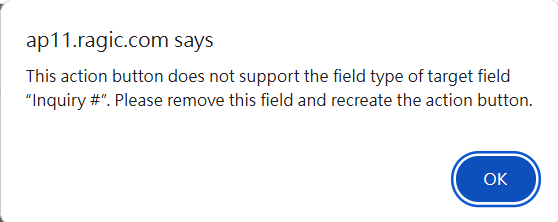
These unsupported field types will not be automatically added when using Auto mapping fields. If the source or target field mapping includes any of these field types, a warning will appear when saving the button settings.
2. Cannot be added to Combine Buttons.
3. Not supported in the Approval Flow Advanced Settings option Execute action button after approval.
4. Not supported in Batch Execute.
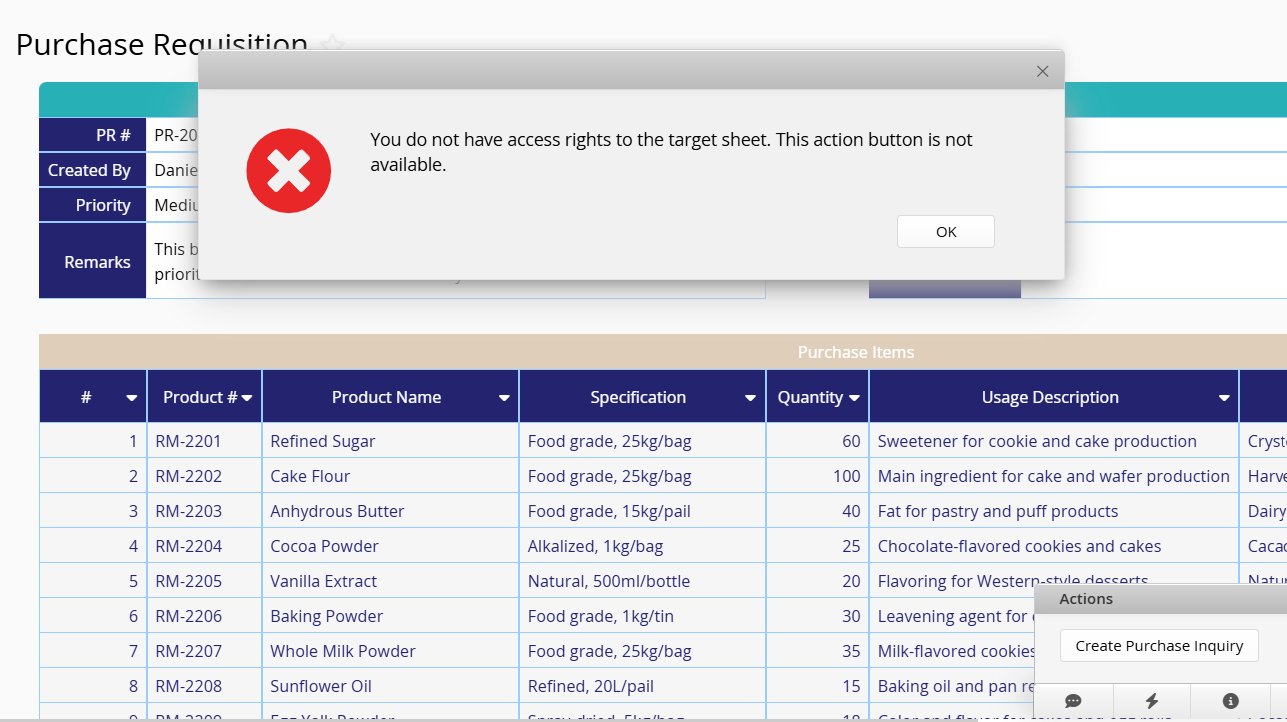
5. If the user does not have access rights to the target sheet, an error message will appear when executing Generate Draft.
If you want to delete the Action Button, you can refer to this article.
Alternatively, if you need additional settings for the Action Button, such as restricting user access rights to use the Action Button, you can refer to this article.
 Thank you for your valuable feedback!