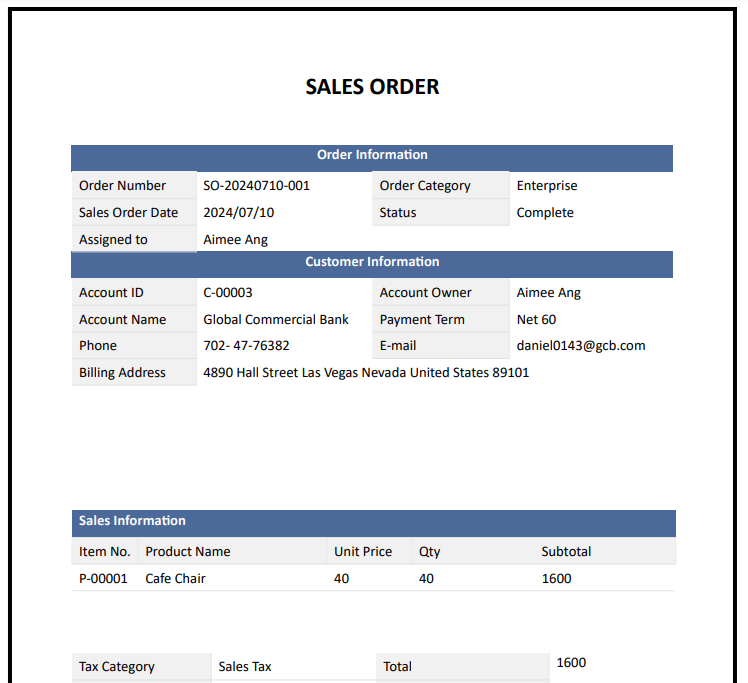
You can export records into custom PDF, Word, or PNG formats in Ragic. For example, export "Sales Orders" into the PDF format your company usually uses.
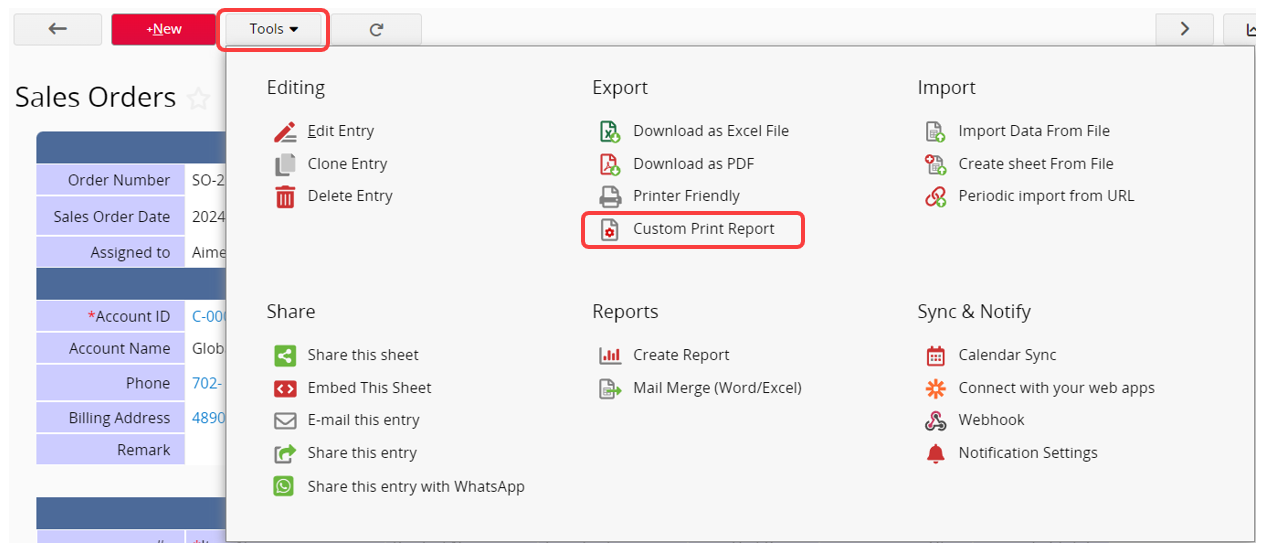
In the Listing Page or Form Page, select Custom Print Report from the Tools.
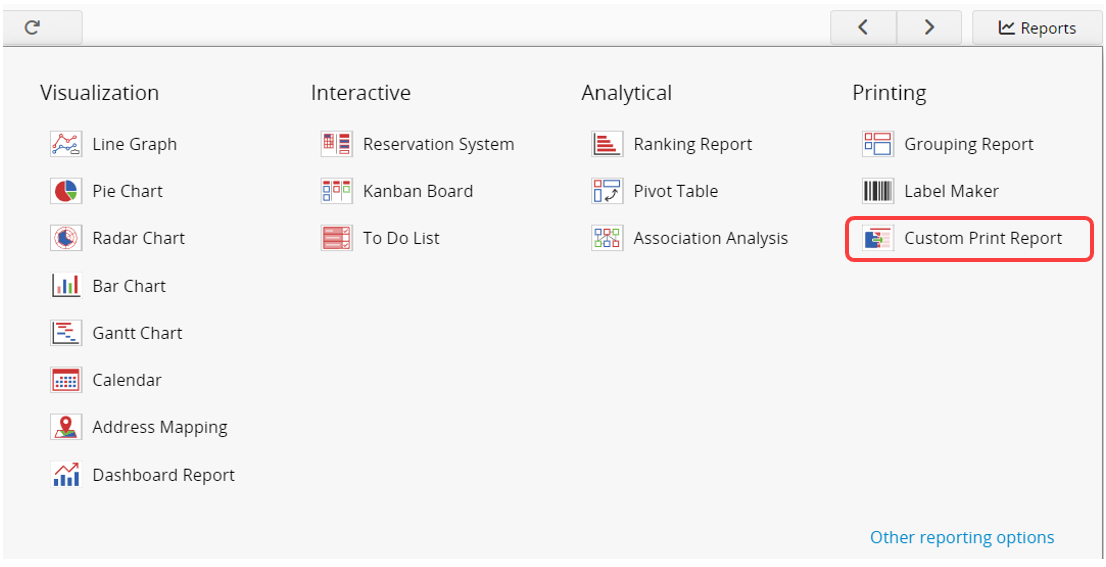
Alternatively, choose Custom Print Report from the Creating Reports step.
You will be directed to this page.
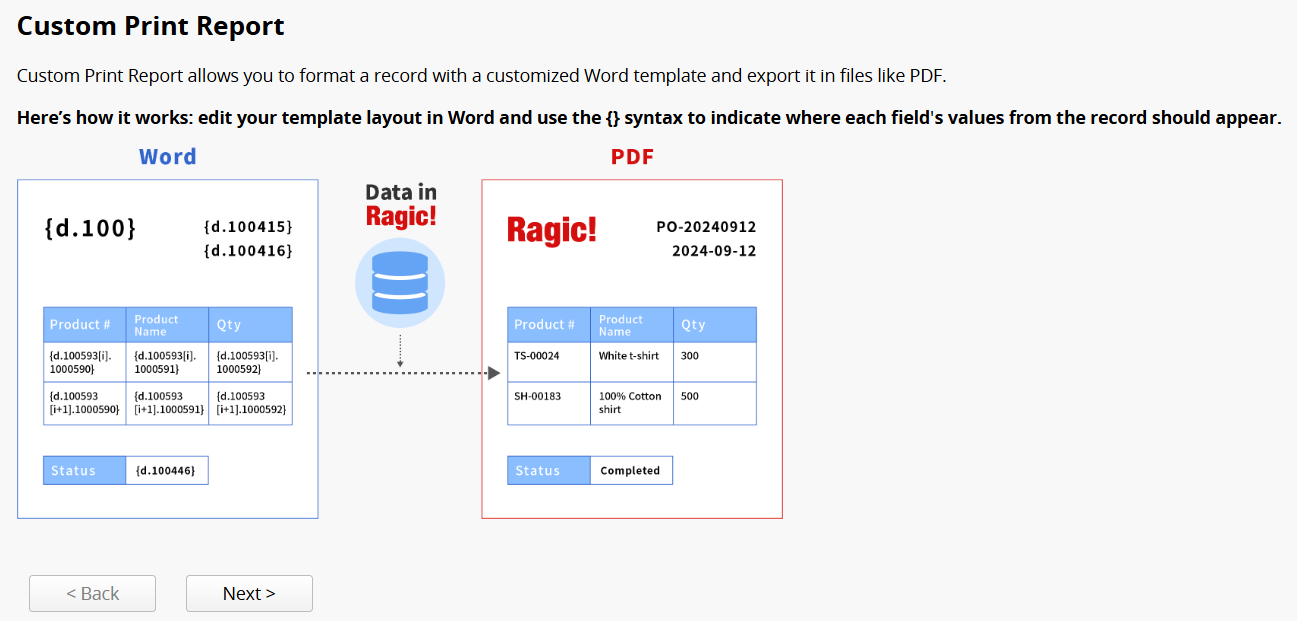
Follow the steps below to create a template.
Note: Only the SYSAdmin has access to create and configure Custom Print Report templates.
1. Checking for Template
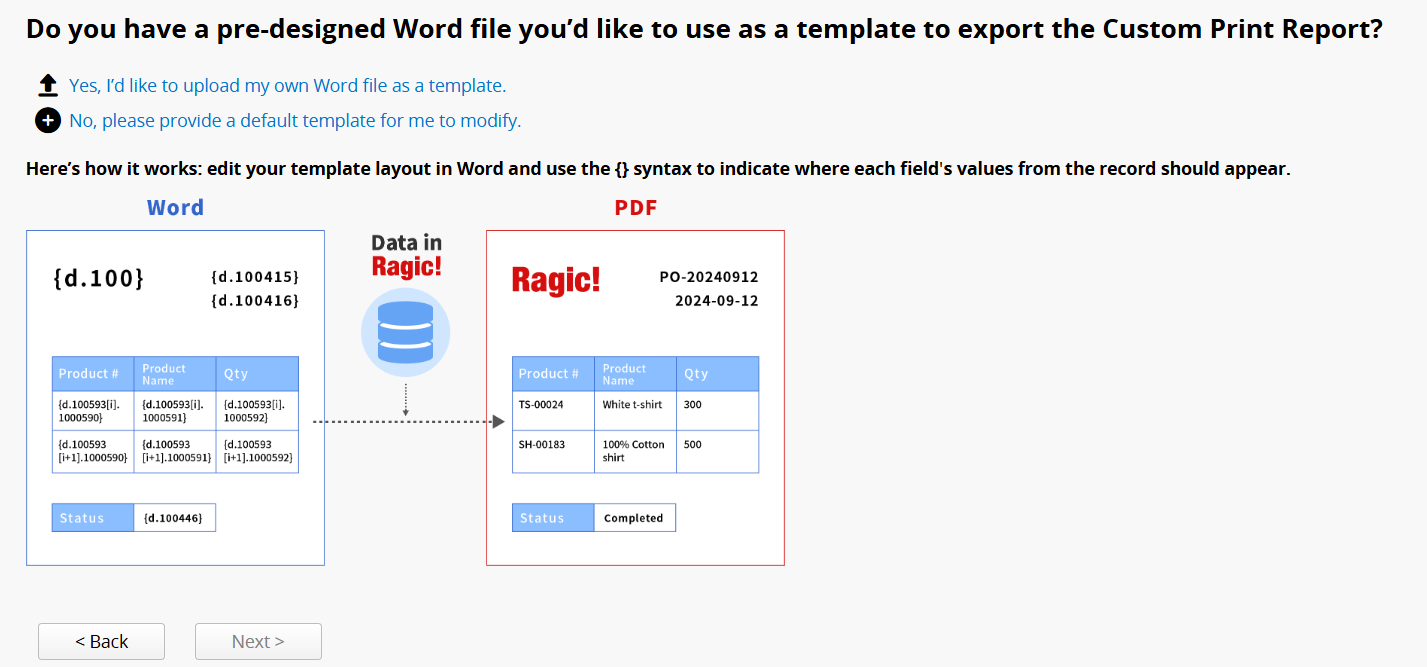
First, the system will check if you already have a Word template.
If you have a template, select Yes, I’d like to upload my own Word file as a template. If you don’t have one, select No, please provide a default template for me to modify.
2. Downloading the Template
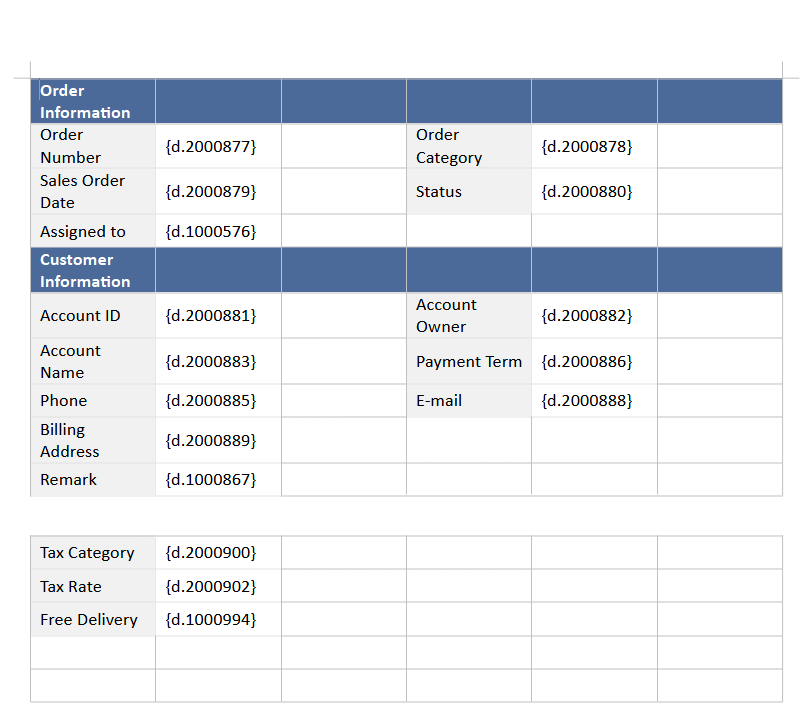
If you select " No, please provide a default template for me to modify", you will be directed to this page. Click Download to download the default template.

3. Modifying the Template
Edit the template to the desired layout or add/remove fields as needed. Refer to this section and this documentation for modification guidelines.
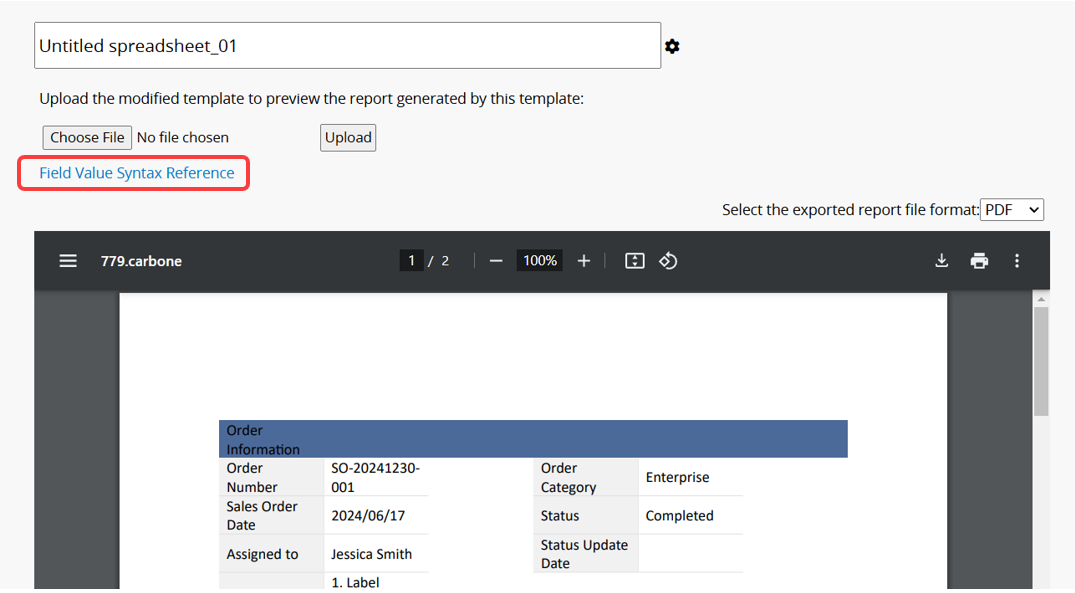
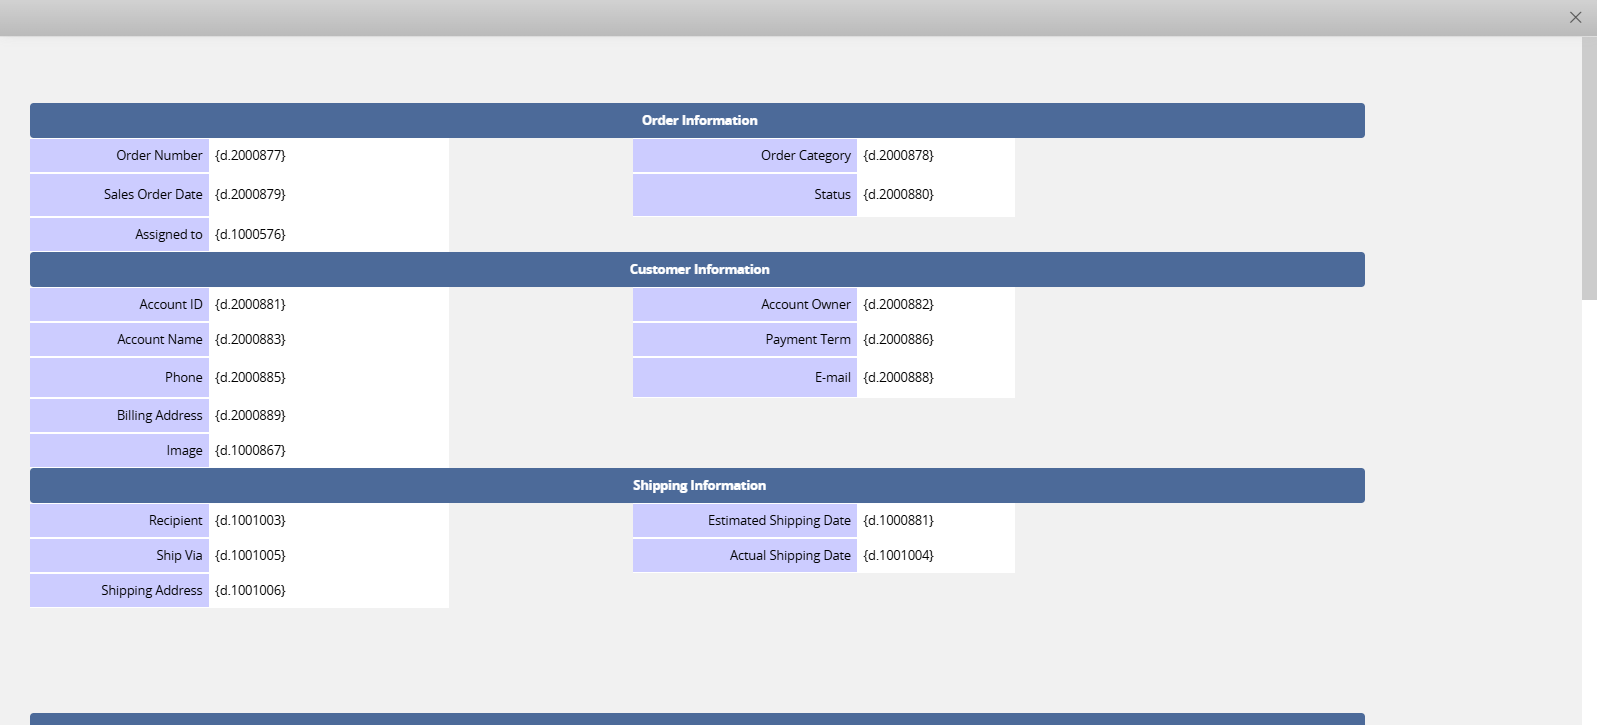
You can refer to the Field Value Syntax Reference on the upload template page for field parameters.
Clicking a field’s syntax will copy the parameter for quick pasting into your template.
Note: The syntax for independent fields and Subtable fields is different.
Independent Fields:

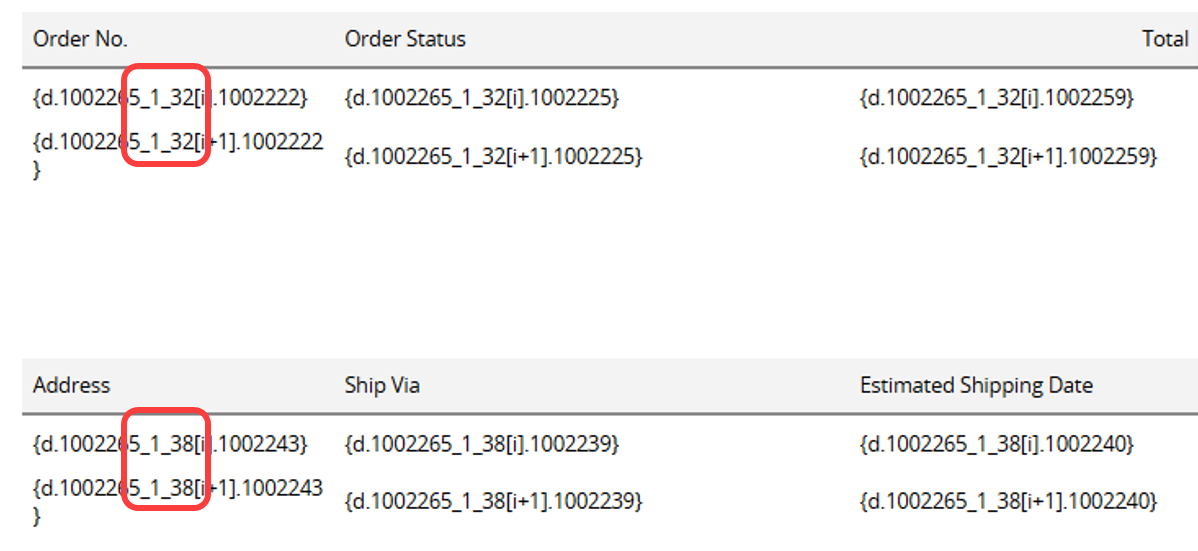
Subtable: Refer to the syntax in the figure below and add only the [i] and [i+1] rows. In the [i+1] row, adding the syntax for just one field will represent the entire row of data.

When a sheet includes multiple Subtables referencing the same source sheet, the system adds Subtable Positions to the field parameters for distinction. If you need to manually add a Subtable Position in the template, you can find it in the Field Value Syntax Reference or Field Info.
4. Uploading the Template
If you choose Yes, I’d like to upload my own Word file as a template or click Next after downloading the template, you will proceed to this page, where you can upload the modified template.
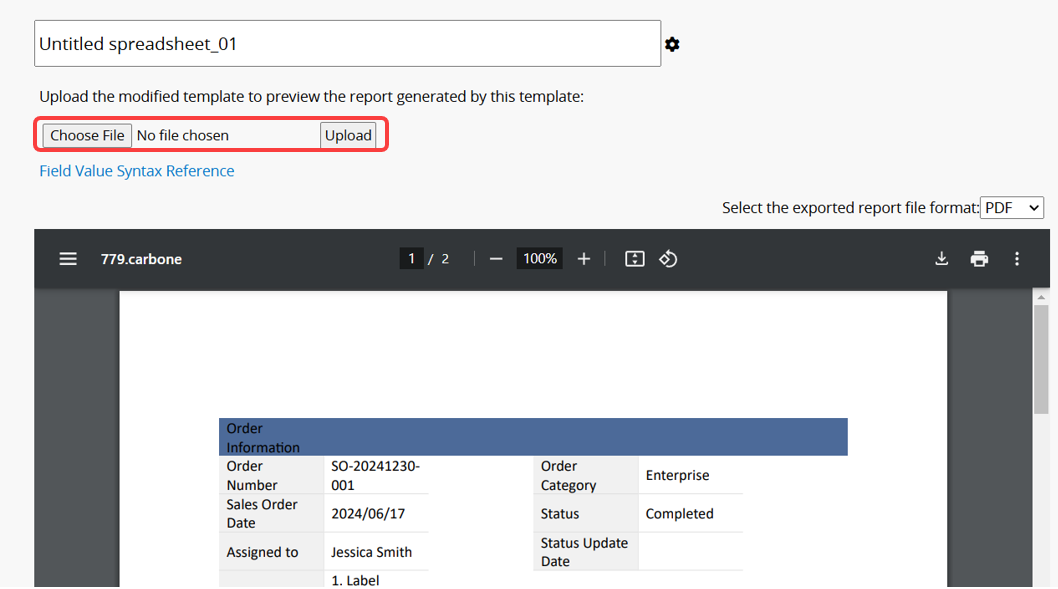
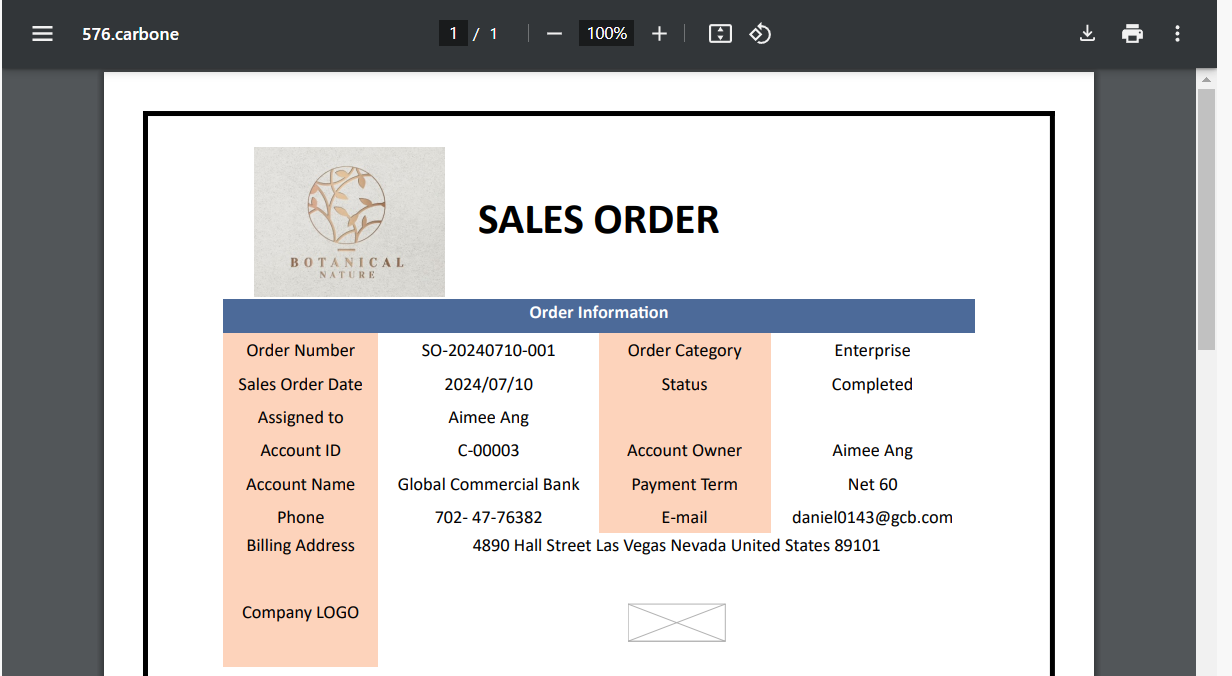
You can preview it from the window below.
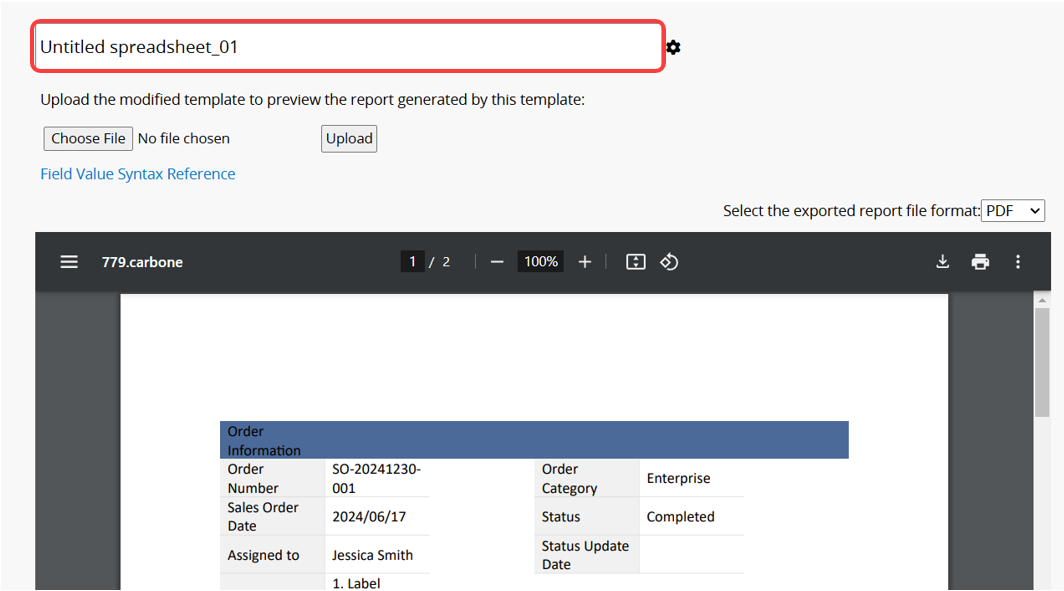
Name the Report: In the top corner, you can change the report name. Since there can be multiple versions of Custom Print Reports, use a simple and clear name for easy identification.
File Format: In the top-right corner of the preview window, choose the file format for download. You can download the report as a PDF, PNG image, or Word document.
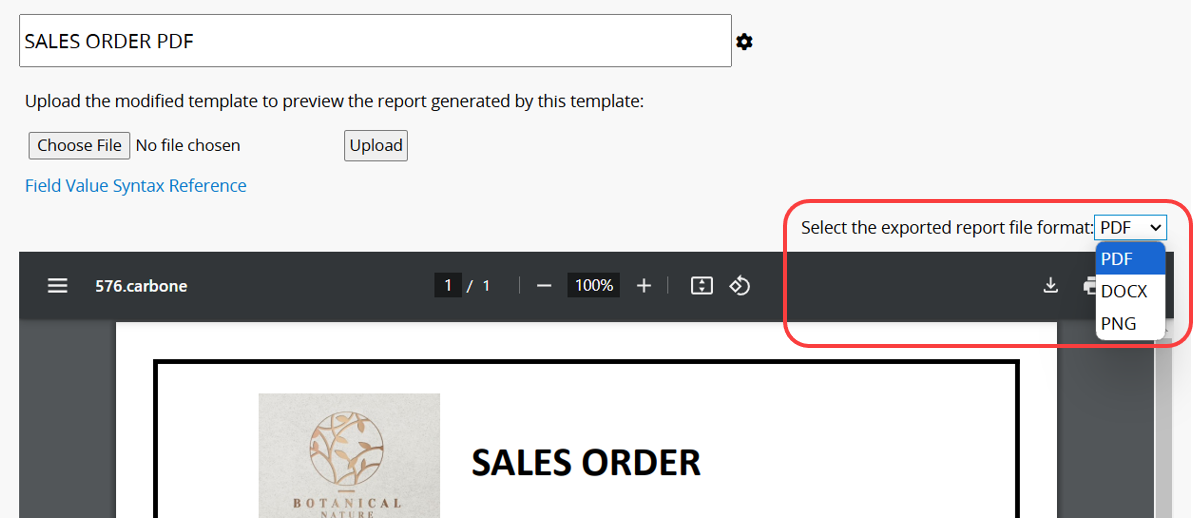
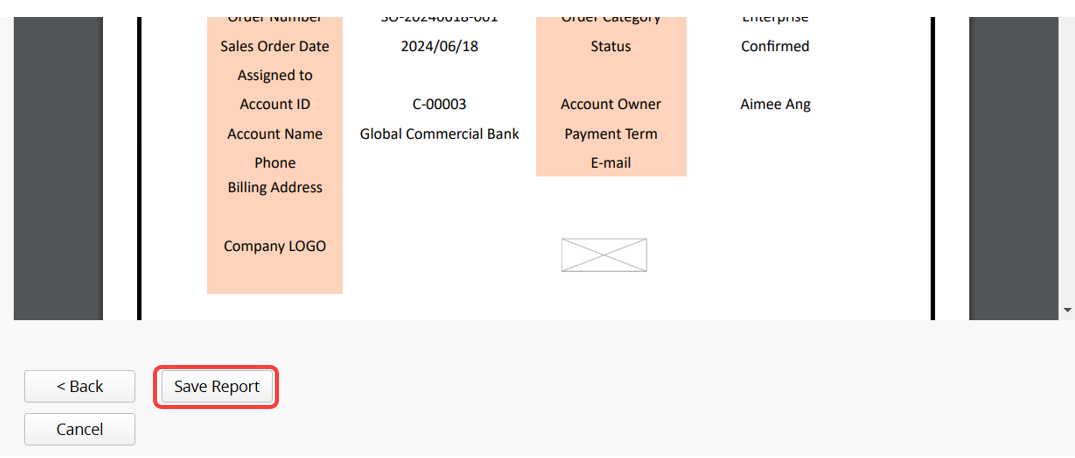
After completing all settings, click "Save Report".
Note: For Advanced settings, please refer to this section.
It will lead to the following page.
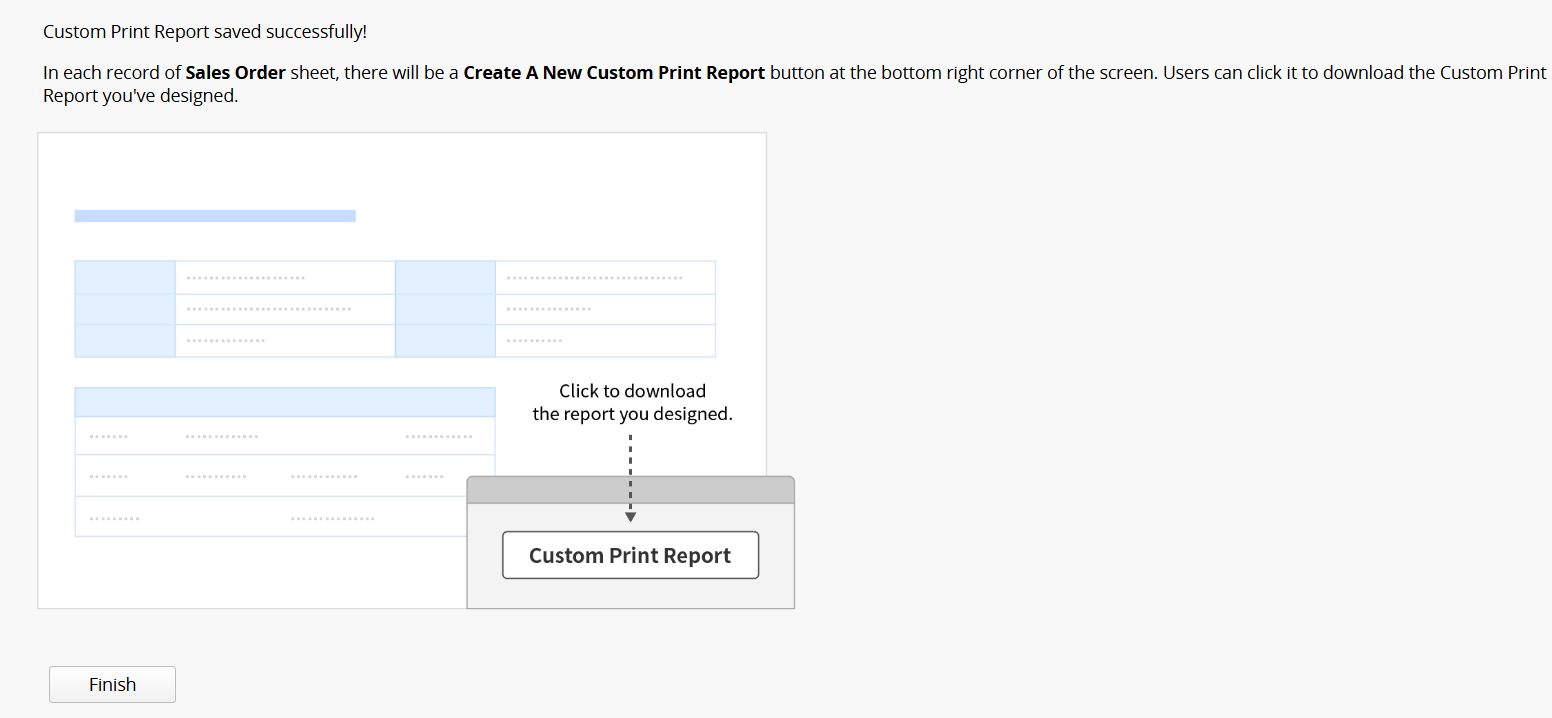
Click "Finish" at the bottom to see the report button added to the lower right corner, and you can start using the Custom Print Report.
Click the gear icon next to the report name and select Advanced setting to configure the following options.

Access Rights: Set which groups can use this report.
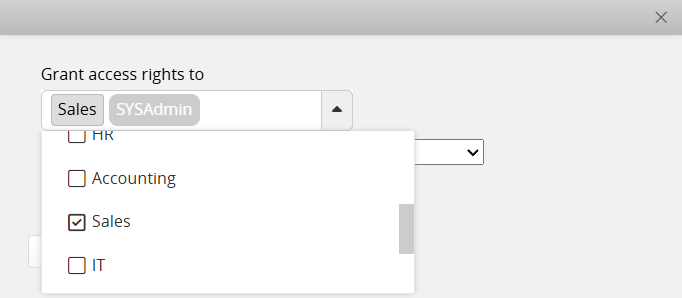
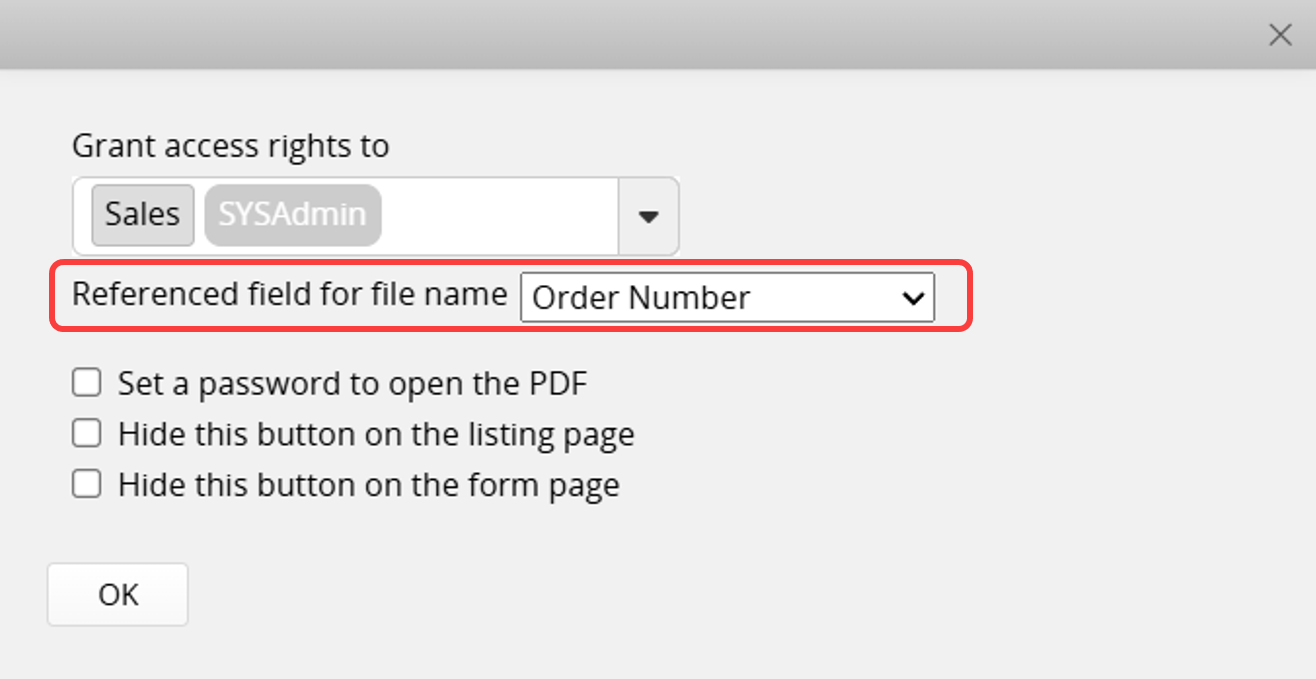
Referenced Field for File Name: Specify which field in the sheet should be used to name the downloaded file.
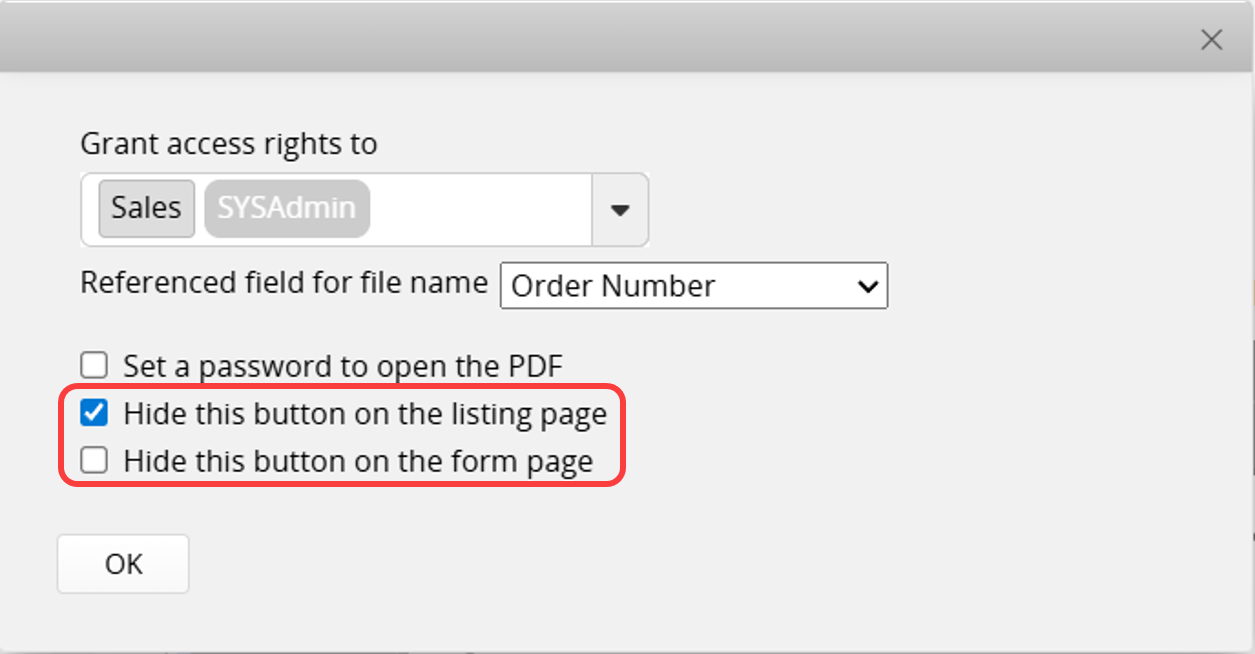
Hide the button: You can choose to hide the action button on the Listing Page or the Form Page.
The following options are available only when the File Format is PDF:
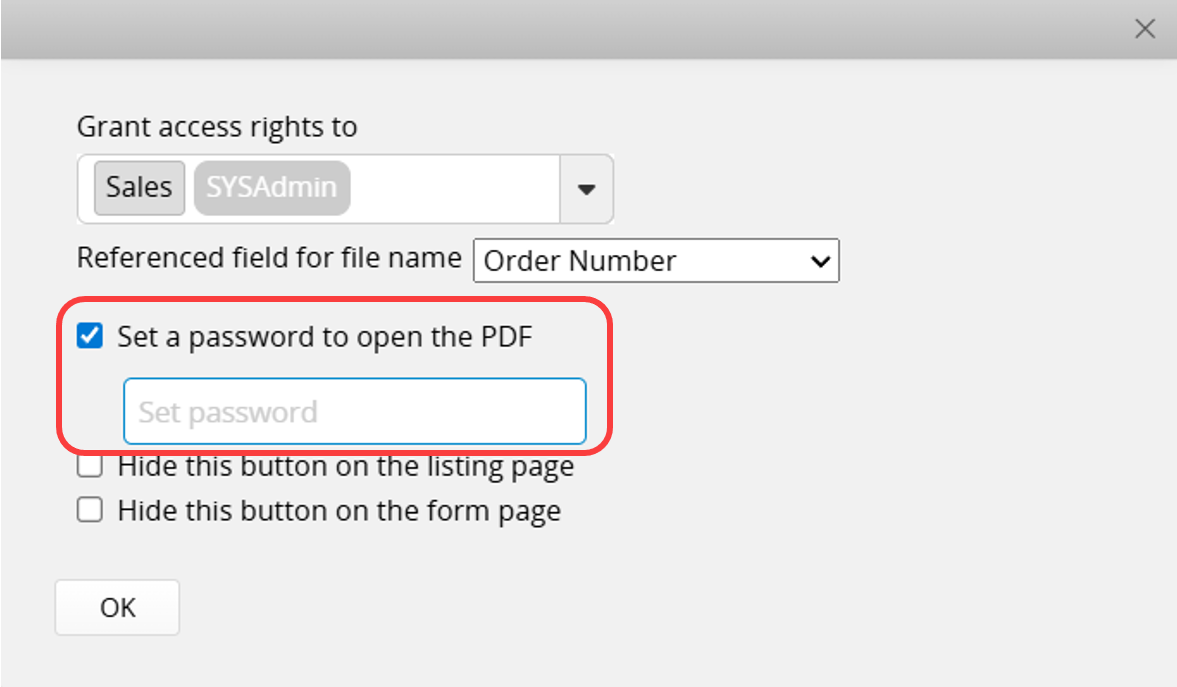
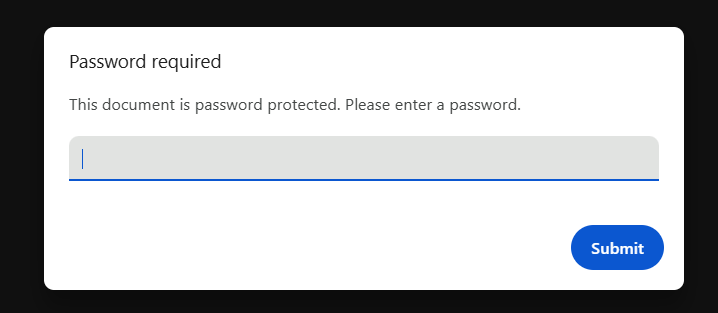
Set a password to open the PDF: After enabling this option, you can set a password. The downloaded PDF file will then require that password to be opened.
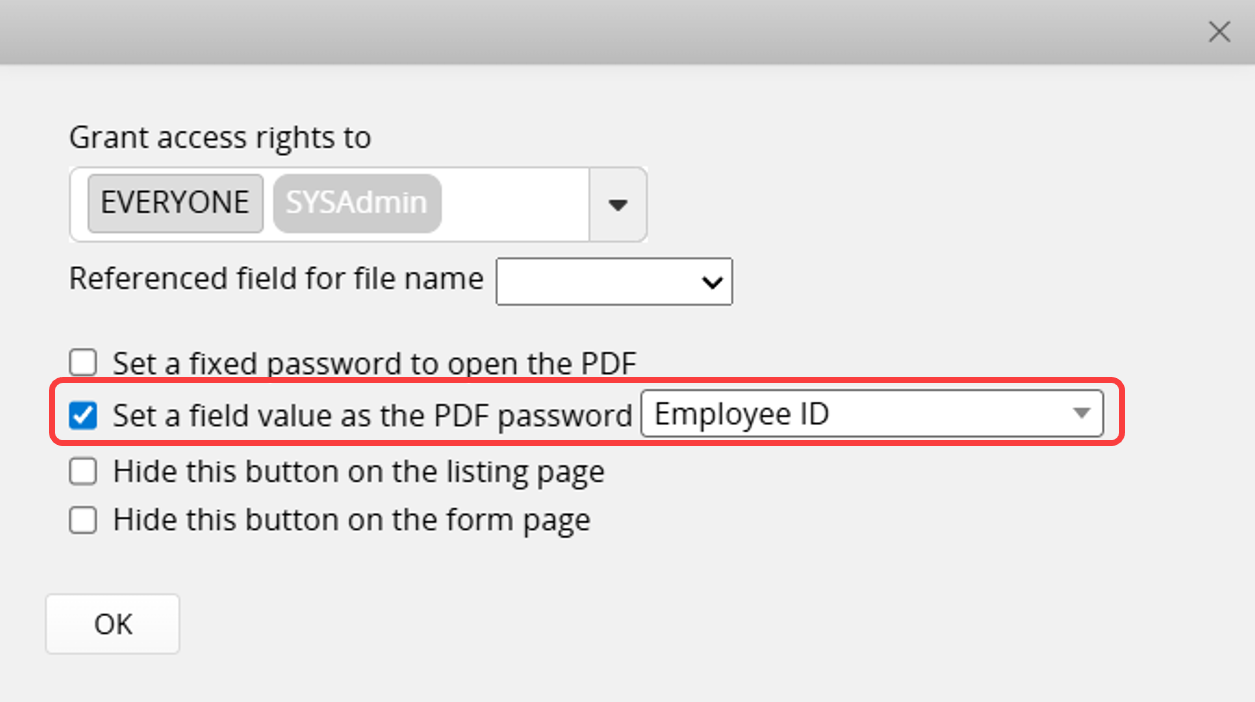
Set a field value as the PDF password: After enabling this option, you can select a field value from the sheet as the password. For example, for an "Employee Pay Slip", you can use the employee's "Employee ID" as the password. The employee must enter their own "Employee ID" to open their pay slip PDF file.
Notes:
1. This setting and the Set a fixed password to open the PDF option cannot be used at the same time.
2. If the specified field value is empty, the downloaded PDF will not be password-encrypted.
3. Downloading multiple records and combining them into a single PDF will result in a PDF that is not password-encrypted.
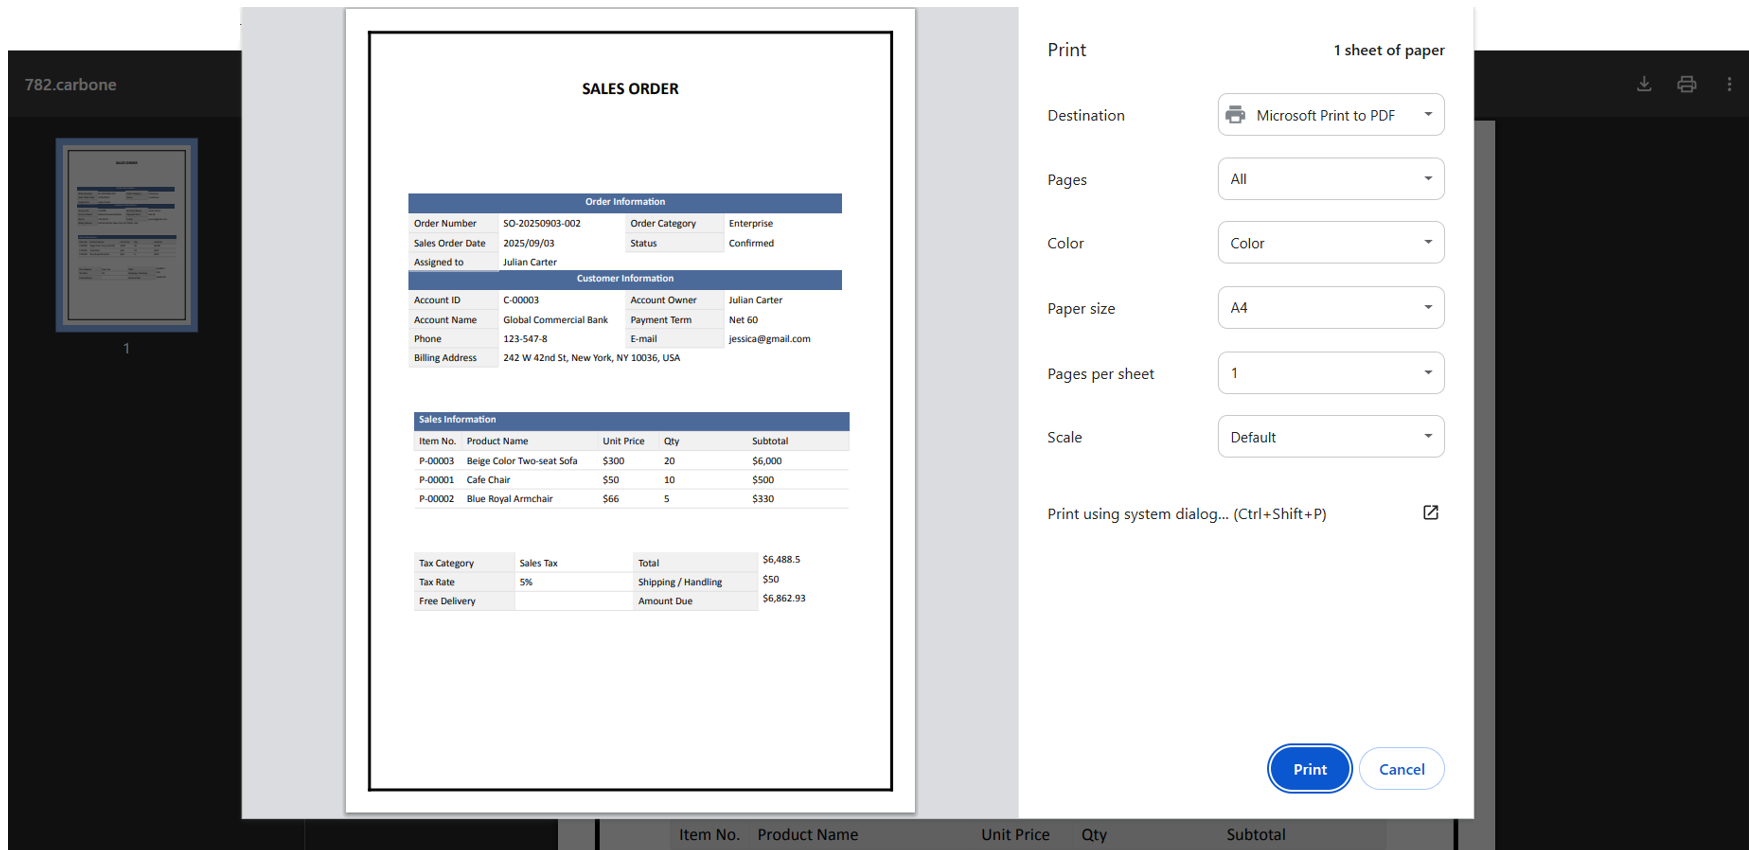
Use print preview instead of direct download: When enabled, clicking the report button opens a new window with a preview page, allowing you to print without downloading the file. When downloading multiple records, Print Preview is supported only when saving as A single file. Saving as Separated files (compressed into a zip file) or Storing to a File Upload Field is not supported.

Entering the Custom Print Report page again allows you to add a new report or modify an existing one.
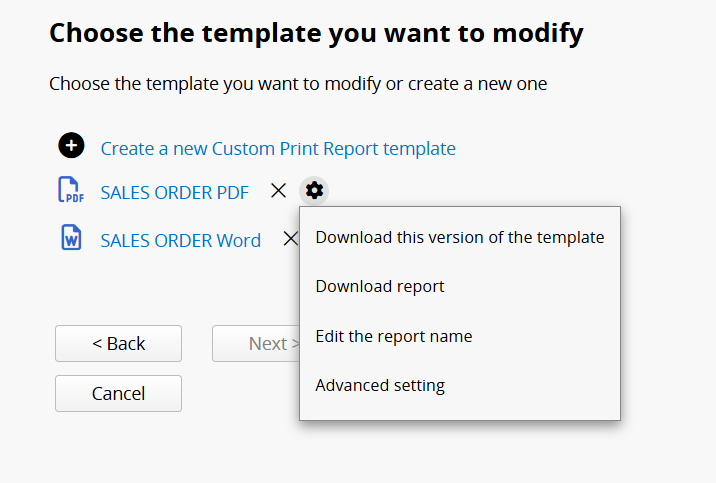
You can also click the gear icon next to the report name to modify the Report Name, configure Advanced setting, or Download the template or report.
Click on the report you want to modify, and you can upload the revised template again.
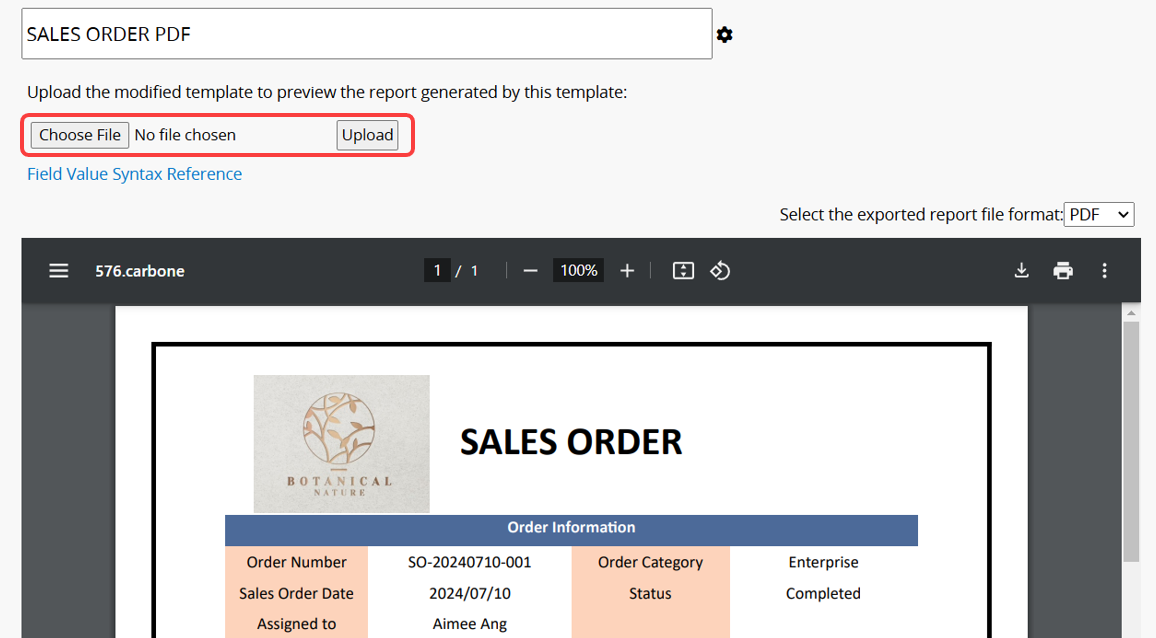
You can click the gear icon next to the report name and select Download this version of the template to download the template saved for this report for further modifications.

The addition, modification, and deletion of templates are all recorded in the Previous Versions. Click the template link to download the corresponding version of the file.

You can click the "X" next to the report on this page to delete the saved report.
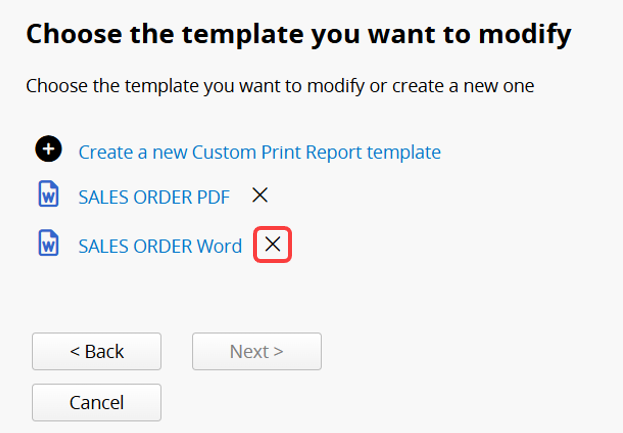
Note: When a report is saved, a corresponding action button is automatically generated. This button cannot be deleted by Removing Action Buttons; it can only be removed by deleting the corresponding report through the Custom Print Report settings page.
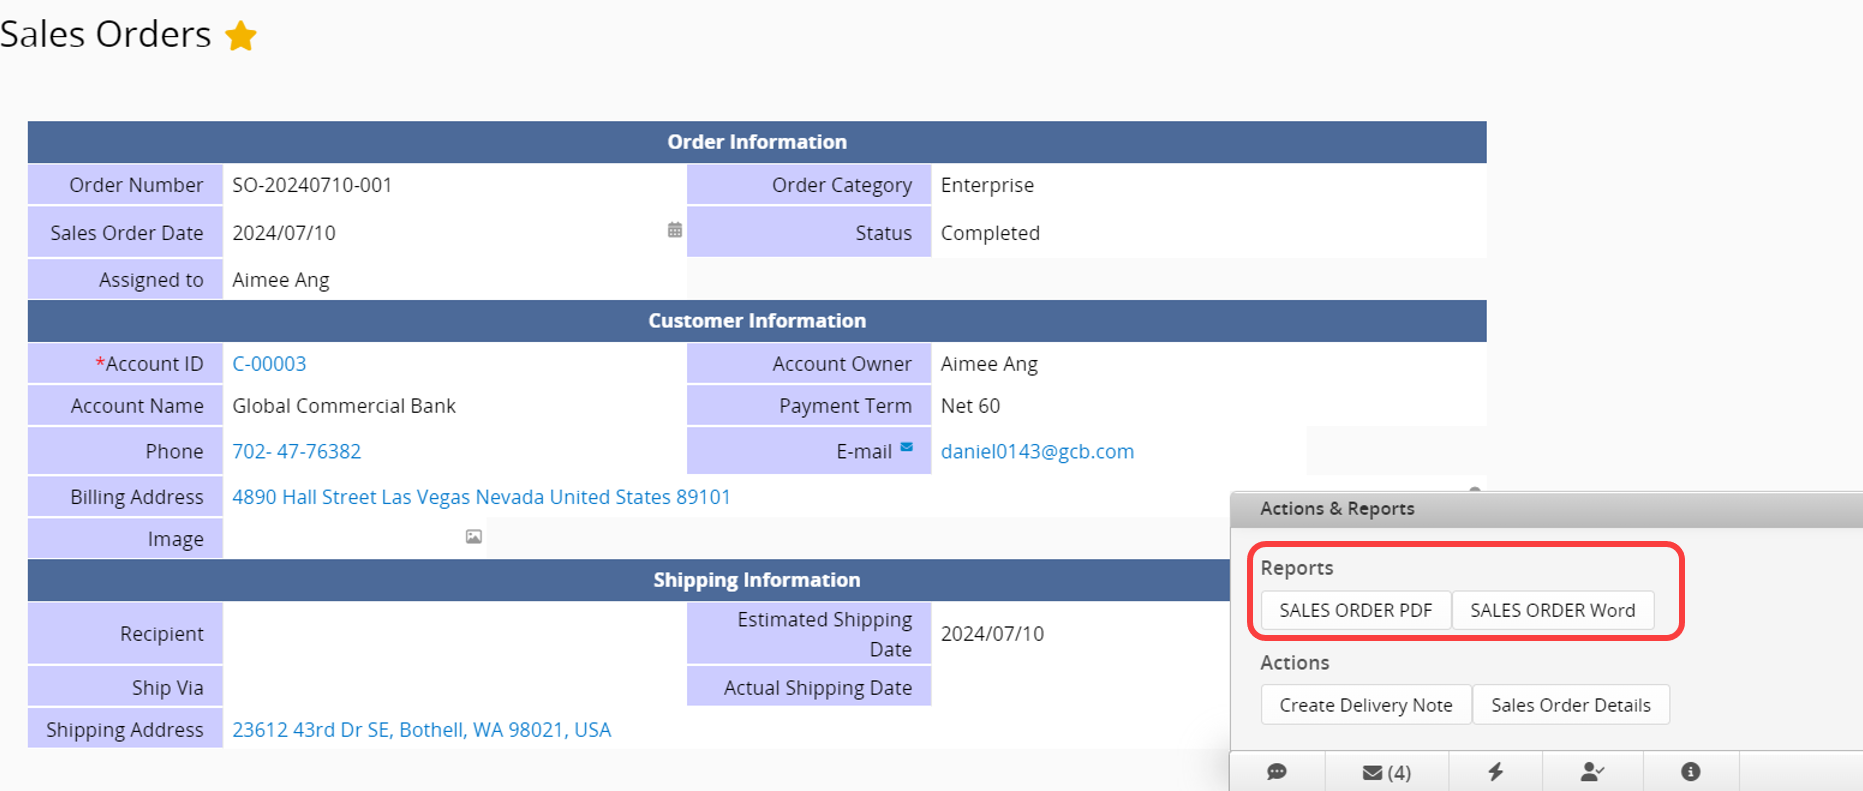
After saving, go to the Form Page of the record you want to print. In the lower right corner, an action button for the saved Custom Print Report will appear. Click the button to start downloading the file.
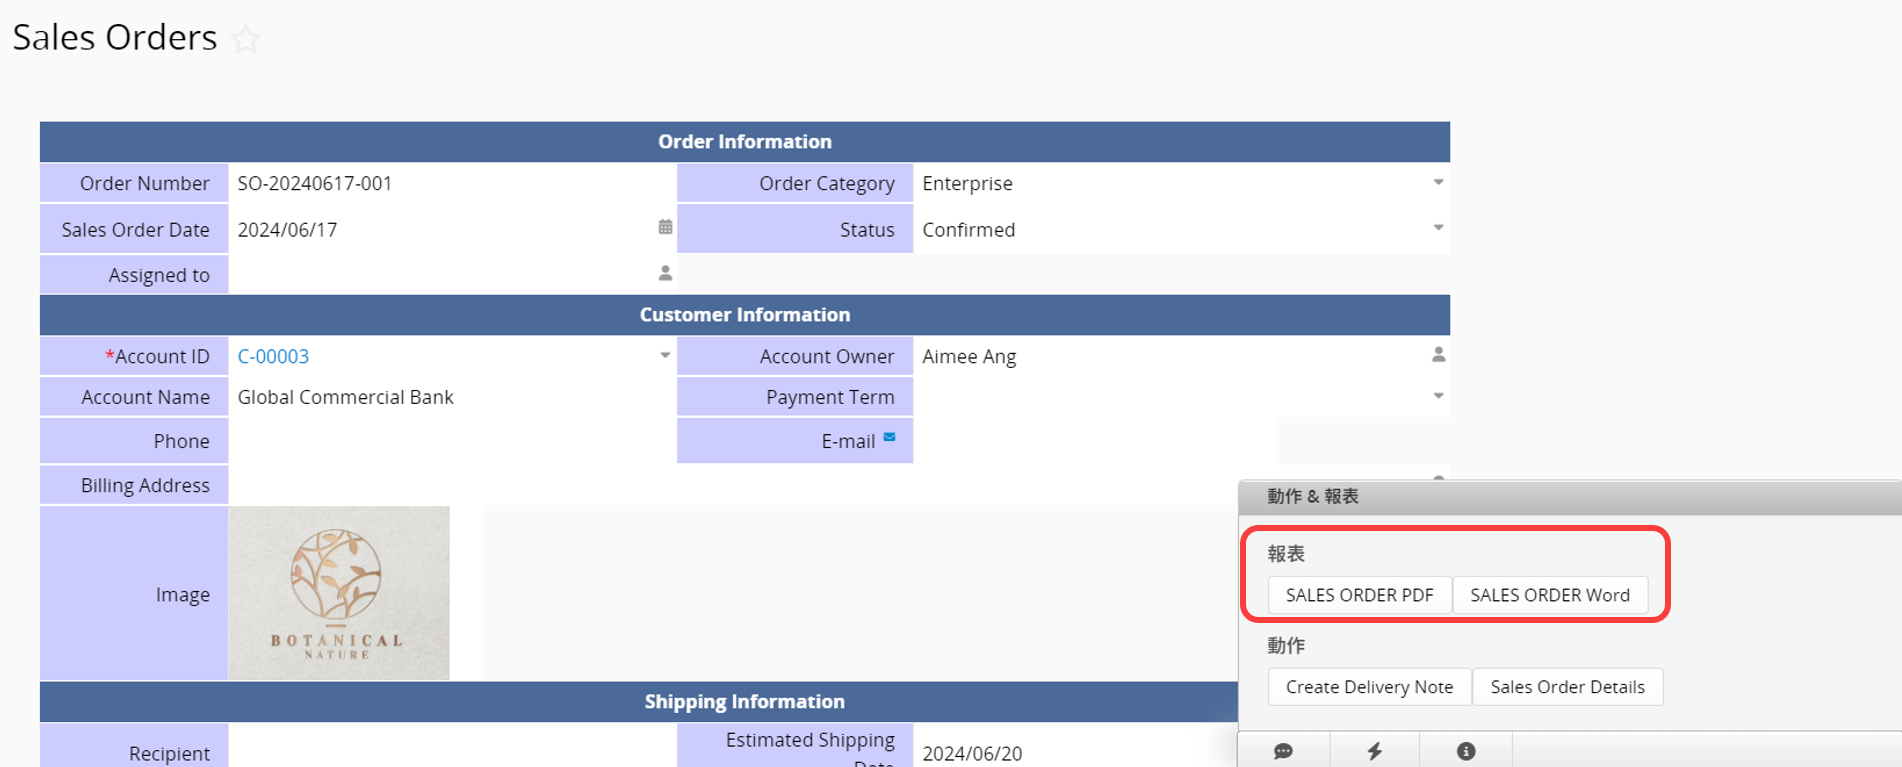
SYSAdmin can also access the Custom Print Report page, select a report, click the gear icon next to the report name, and choose Download report.

Note: If any fields fail to download correctly, please refer to this section and this documentation.
First, click the lower-right icon on the Listing Page to open the button bar.
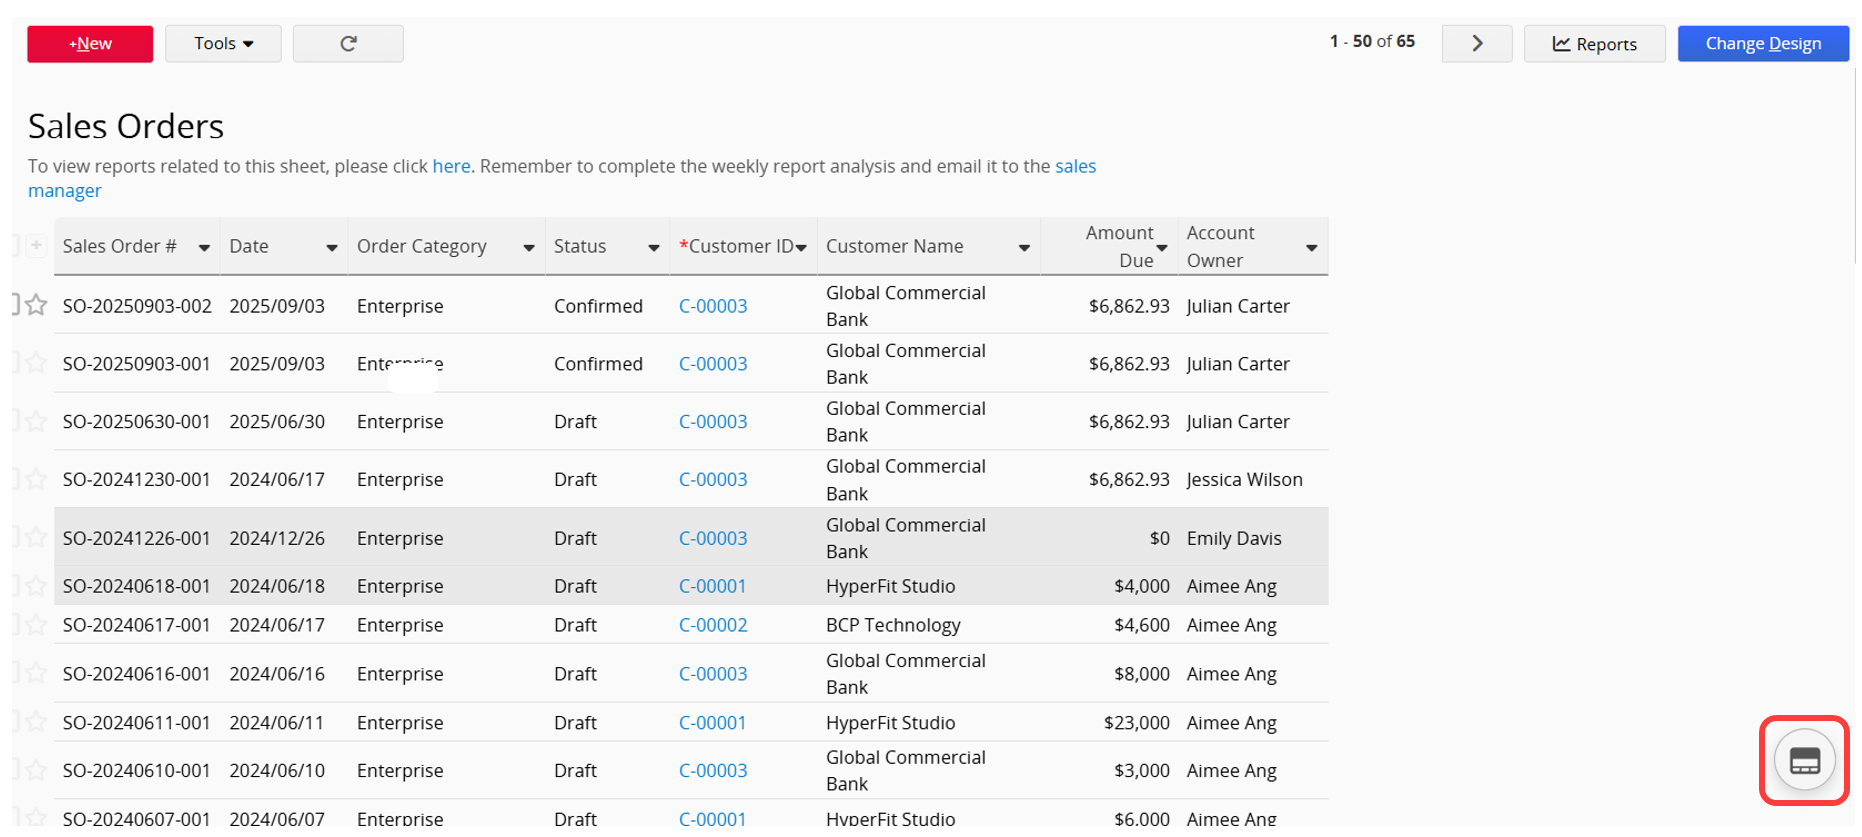
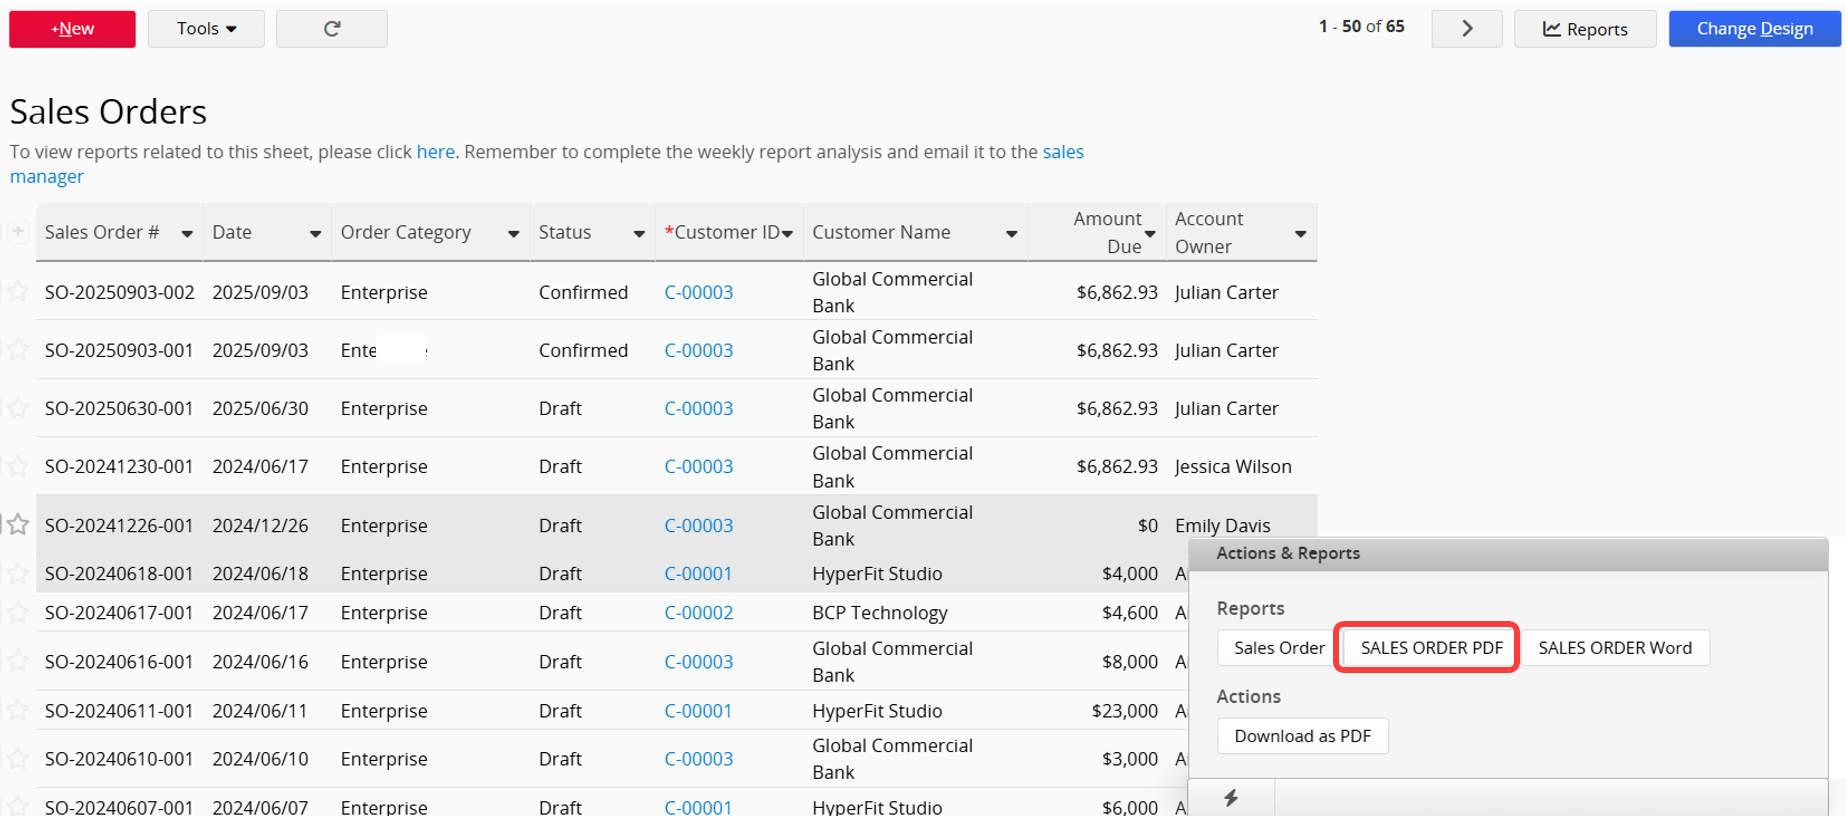
Click the Custom Print Report button to select the record range and export option.
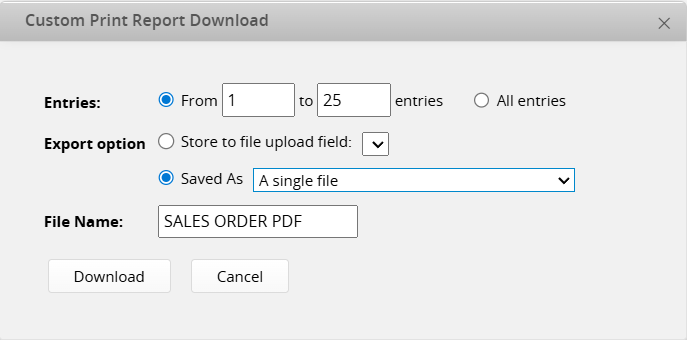
There are two export options:
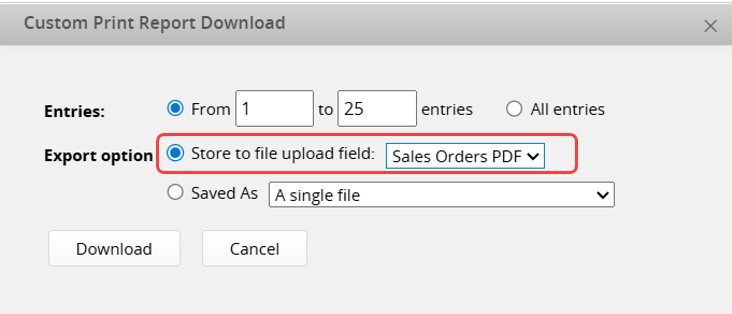
(1) Store to a File Upload Field
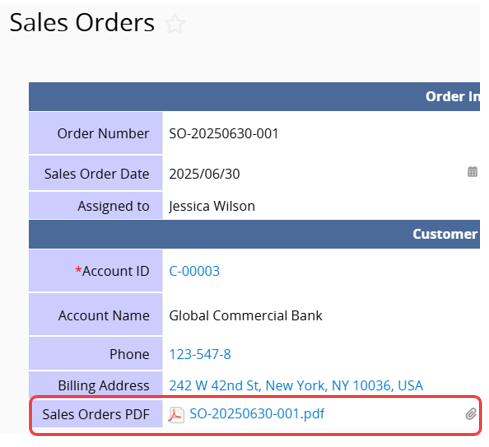
If your sheet contains a File Upload field, you can choose this option to upload the exported file to that field for each specific record.
(2) Save as Files
You can choose to save each record as a Separated files (compressed into a zip file) or combine all records into A single file.
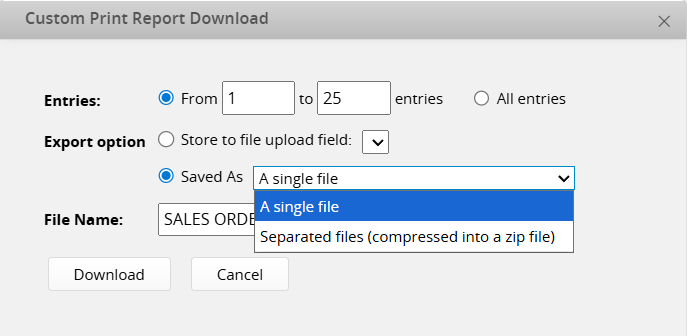
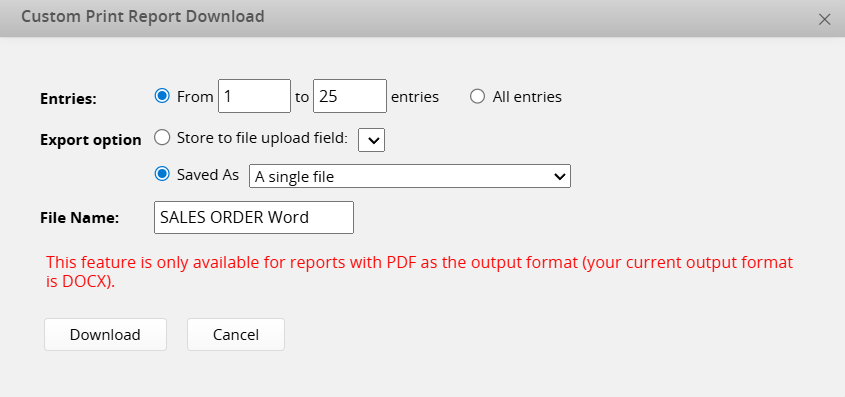
Note: Combining multiple records into A single file is only supported in PDF format.
1. Currently, only the Form Page format is available. To download the Listing Page format, please refer to the Mail Merge.
2. When a sheet has too many fields and the width is excessive, the downloaded template may not show fields that extend beyond the page. Please refer to the Field Value Syntax Reference to add fields to the template.
3. The downloaded template will automatically place Subtable fields at the bottom. If you want to change the location of Subtables, you need to adjust them manually. Please ensure that different Subtables are not placed in the same row, which may cause issues when printing the report.
4. Currently, File Upload fields and fields using certain BBCodes cannot be displayed in the downloaded file. For supported BBCodes and how to adjust the template, please refer to this documentation.
5. If certain fields do not output correctly (e.g., Free Text, Image Upload, Signature, or Barcode fields), please refer to this documentation to manually adjust the template.
If the On-premises Private Server fails to output Image Upload fields correctly, please refer to this section.
6. Currently, Approval Formula fields that return signatures cannot be displayed in the downloaded file, as follows:
(1) APPROVAL.STEP([stepIndex]).SIG([email])
(2) APPROVAL.STEP([stepIndex]).SIGIMG([email], [width], [height]).
7. The provided file formats do not support Excel. If needed, refer to Download as Excel or Mail Merge.
 Thank you for your valuable feedback!